A clean Windows install is a great way to keep your PC feeling snappy. However, every time you do this, certain critical features are reset to their Microsoft defaults—including some that could lock you out permanently.
6
Back Up Your BitLocker Recovery Key
Since Windows 11 24H2, Device Encryption automatically turns on when you clean install and sign in with a Microsoft account. This only affects fresh installs or new PCs with 24H2 preinstalled—not upgrades. You can check this by going to Settings > Privacy & security > Device encryption.
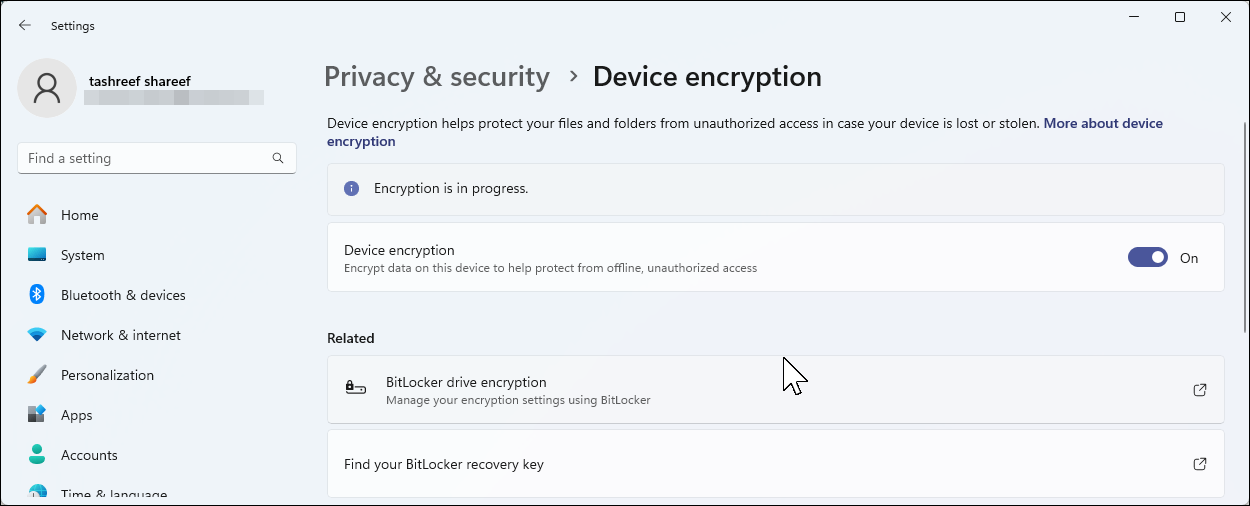
While automatic encryption is great for security, there’s a catch: Microsoft stores your recovery key in the cloud, but this may not be obvious during setup. If your system ever crashes, has boot issues, or undergoes significant hardware changes, Windows will require this 48-digit key to unlock your files.
In most cases, you can simply sign in with your Microsoft account to retrieve the key. However, if you can’t access your account—maybe you forgot the password, lost access to two-factor authentication, or your account was compromised—you’ll need a backup. Without the key, your data is gone forever.
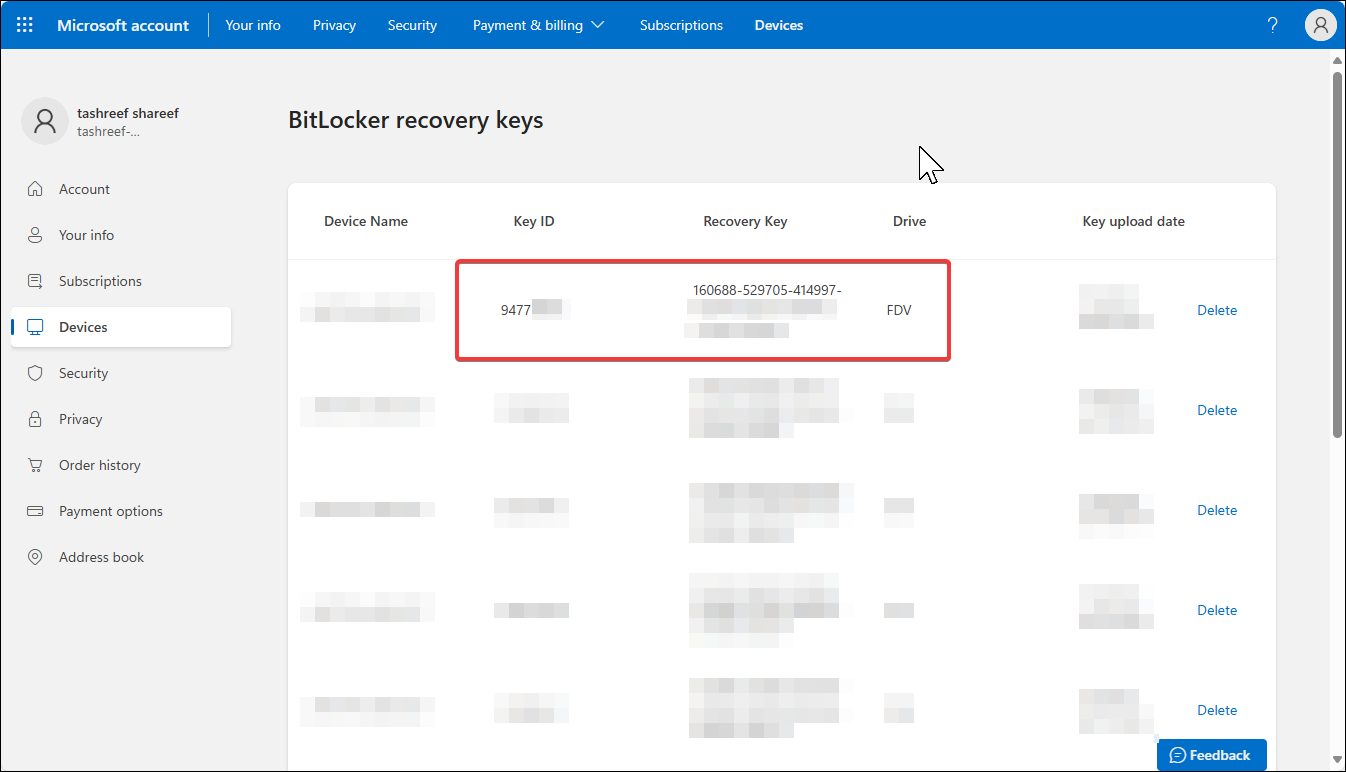
To find and back up your BitLocker recovery key, sign in to your Microsoft account online and navigate to Devices > Manage BitLocker keys. You’ll see a list of recovery keys associated with your devices. Each key has an ID that matches what your computer displays when it needs the key. We recommend printing this key and storing it somewhere safe, or saving it to a USB drive that you keep separate from your computer. You can also take a photo with your phone—just make sure it’s backed up somewhere.
If you prefer not to use device encryption, you can disable it through the toggle in Settings > Privacy & Security > Device encryption. Remember that doing so is trading security for convenience, and on modern systems, the performance difference of encryption is usually negligible.
Related
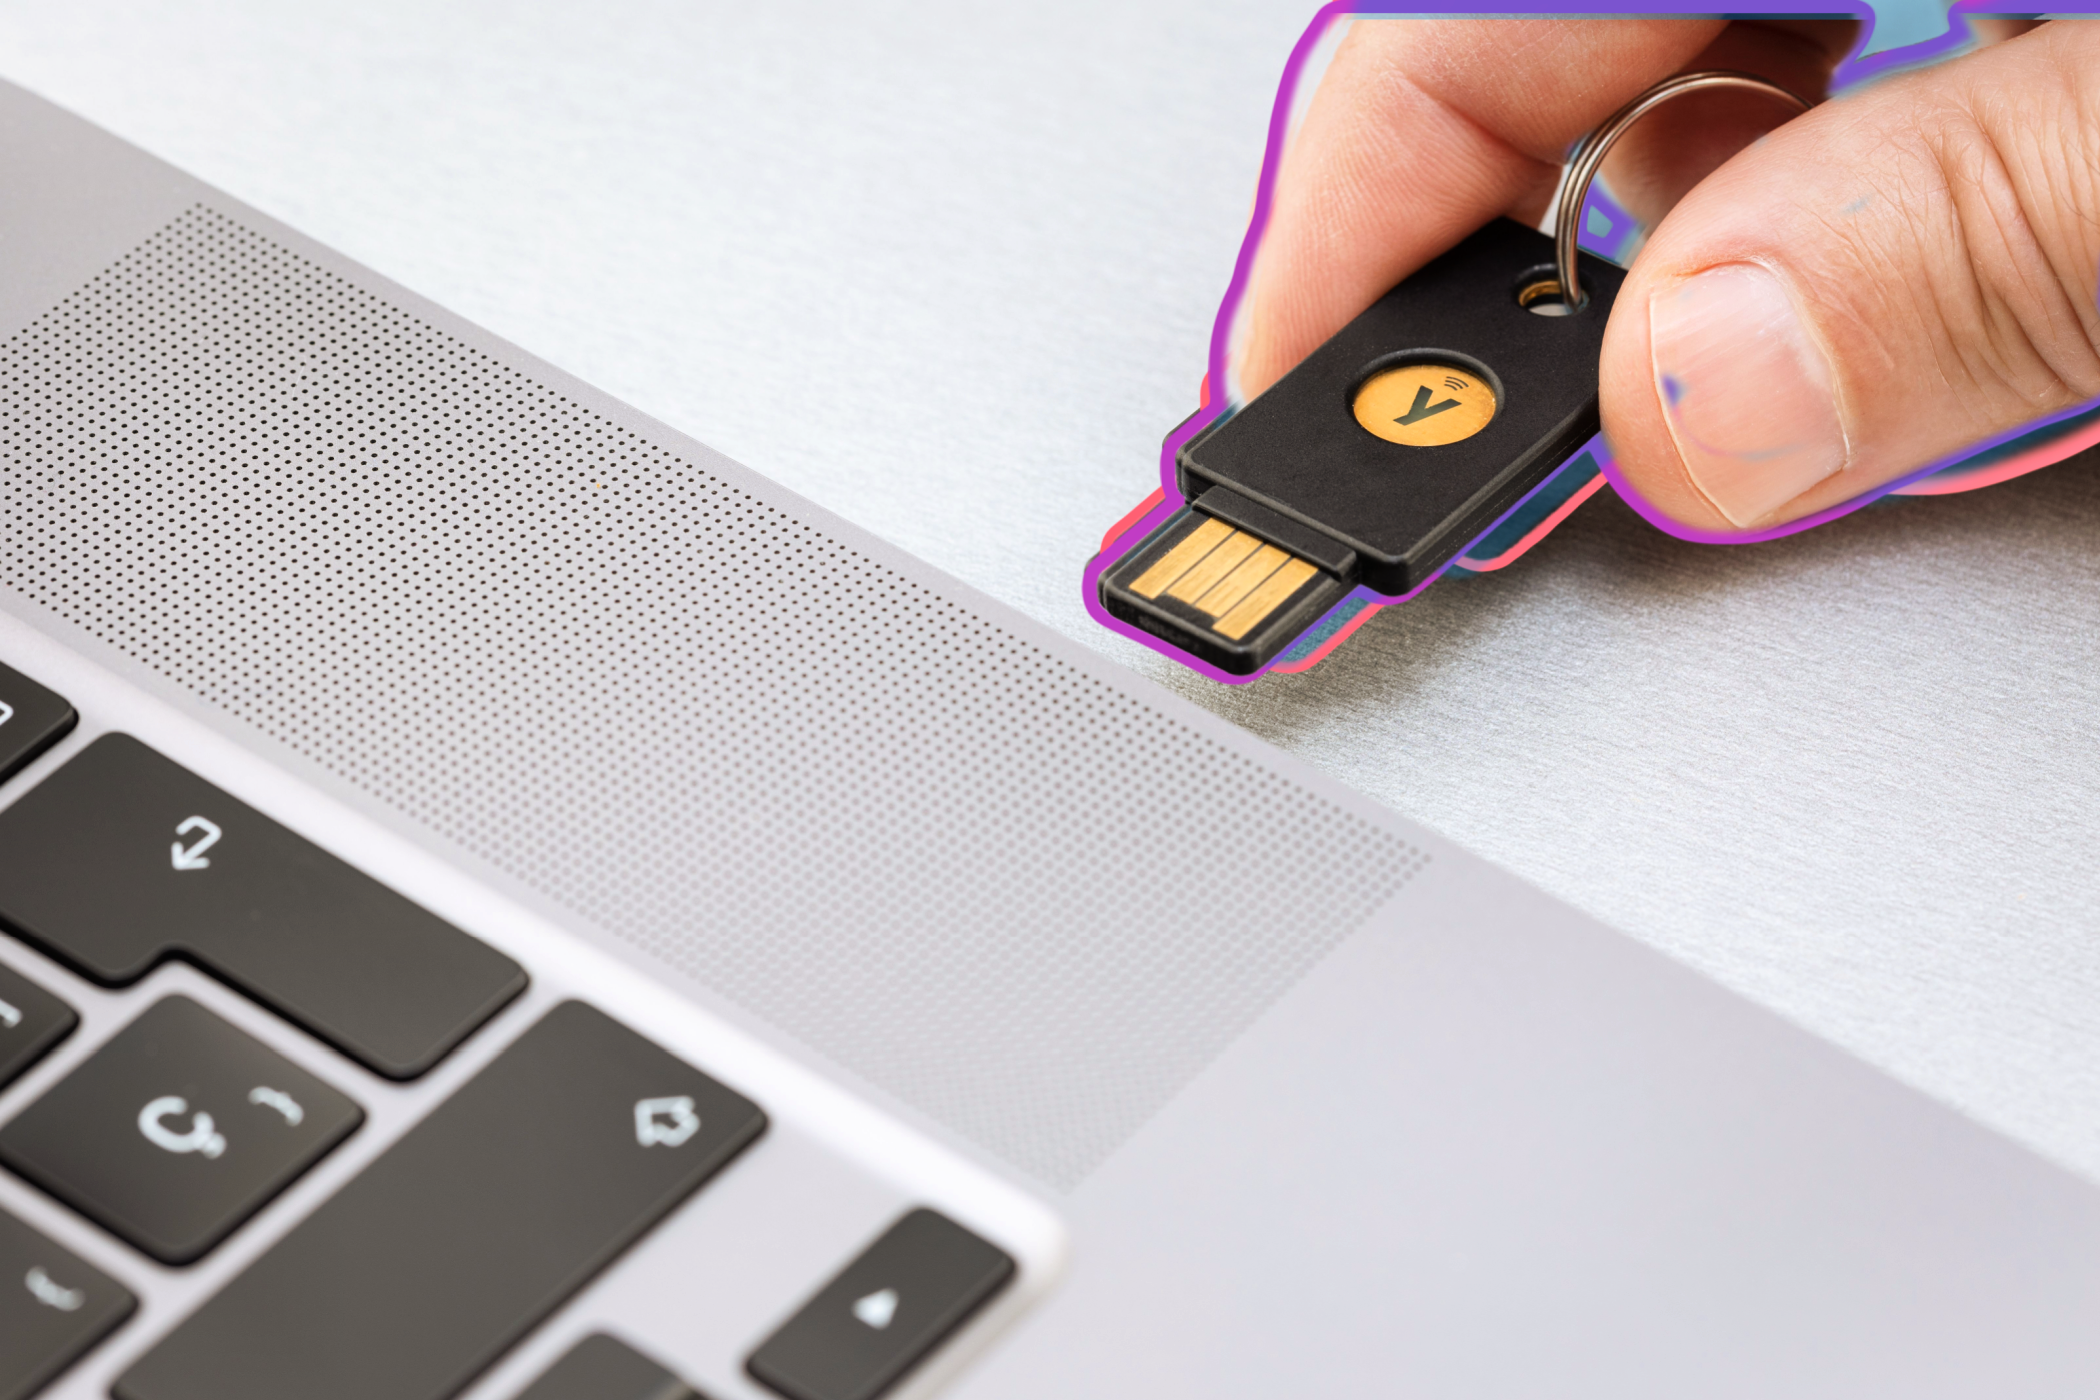
Why I Use a Security Key to Keep My Most Important Accounts Secure
If you want to boost your account security, I strongly recommend picking up a security key.
5
Enable System Protection to Create Restore Points
System Protection is Windows’ built-in time machine for your system files and settings. When something goes wrong—maybe a driver update breaks your audio, or a program installation corrupts system files—you can use a restore point to undo the changes and restore your PC to an earlier point where everything was working correctly.
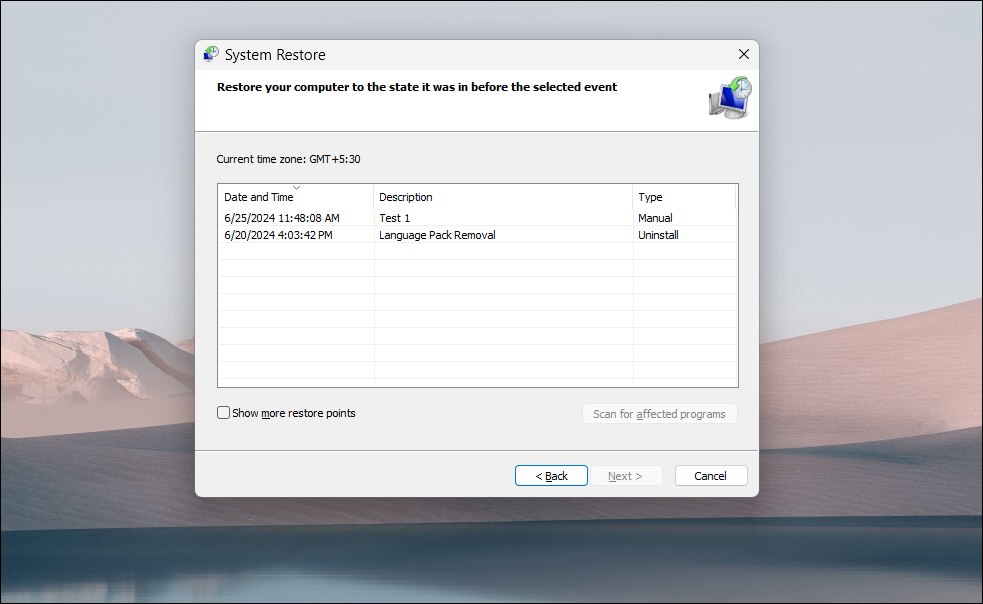
Windows disables this feature by default to save disk space, especially on devices with limited storage. While I understand the reasoning, this leaves you without a safety net. Even if you’re already following a proper backup strategy for your Windows 11 PC, enabling System Protection is a great way to undo unintended changes that broke your computer.
Before you can create a system restore, you need to enable System Protection. To do this, click Start, type View advanced system settings, and open it from the search results. In the System Properties dialog, open the System Protection tab.
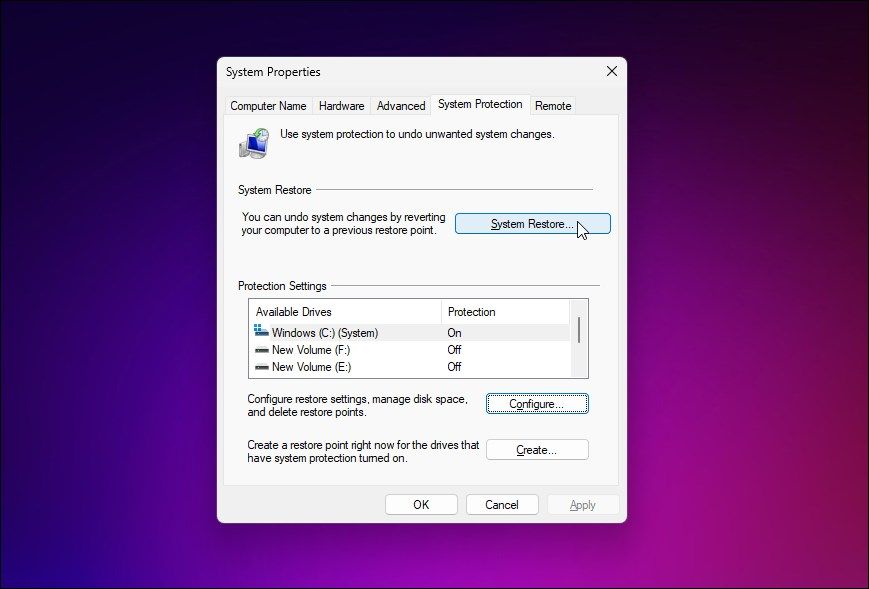
Select your system drive (usually C:), click Configure, and select Turn on system protection. I usually set it to use about 5-10% of my drive space—enough for several restore points without eating too much storage. Click Apply to save the changes.
Now create your first restore point: in the System Properties dialog, click Create, name your restore point, and click Create again. While this creates a manual restore point, you should also see our guide on creating and using restore points in Windows 11 to learn about automatic scheduling and other management tips.
4
Update Windows and Install the Latest Drivers
Windows Update starts nagging you almost immediately after a fresh install, but as it turns out, those first updates are crucial. They often include security patches, driver updates, and fixes for issues that cropped up since you created the installation media.
Go to Settings > Windows Update and install all the pending updates. Keep running Windows Update until no more updates are available. This usually takes at least two rounds of updates with restarts in between. Don’t skip this step thinking you’ll do it later—I’ve seen too many people run into weird issues that a simple update would have prevented.
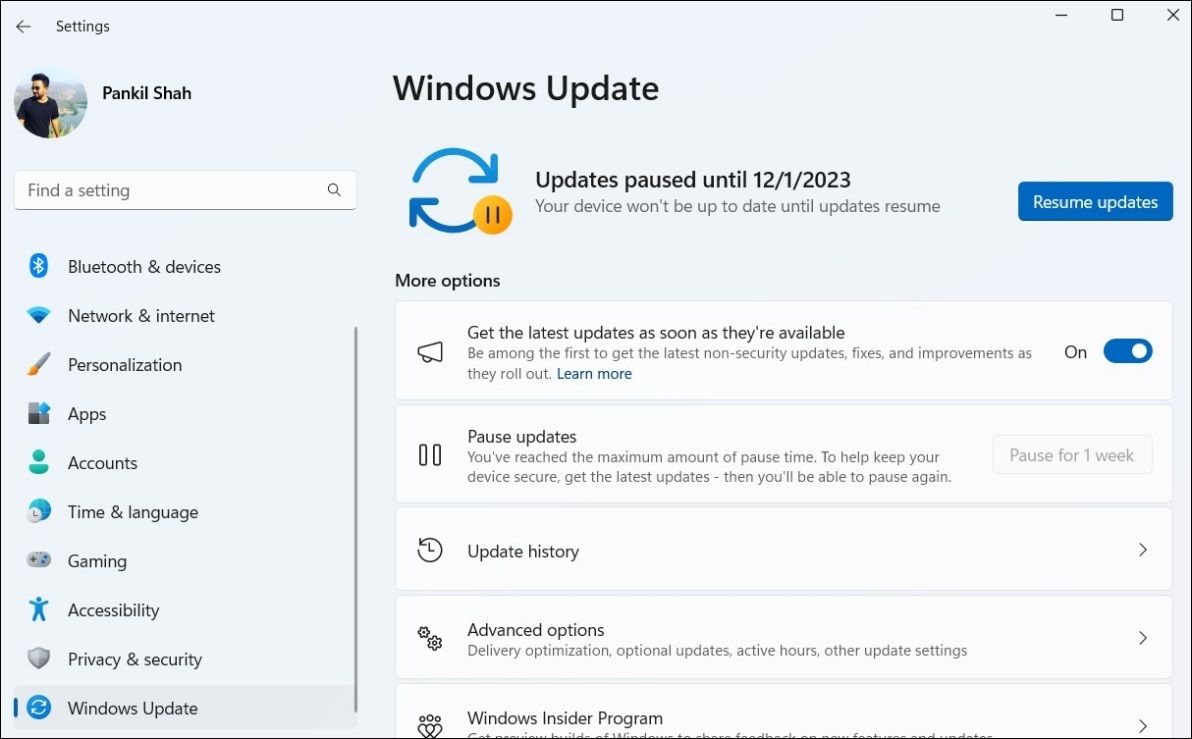
After Windows updates are done, it’s time for the drivers Windows Update missed. Your graphics drivers especially need attention. Windows installs basic display drivers that work, but they’re terrible for performance. To update your graphics drivers in Windows 11, head to NVIDIA’s or AMD’s website and download their official driver tools. These will ensure you get the latest drivers optimized for your specific graphics card.
While you’re doing this housekeeping, take a few minutes to remove the Windows bloatware that comes preinstalled. Even clean installs include apps like Candy Crush and various Microsoft services you might never use.
3
Change Your Power Settings
Windows’ default power settings are conservative—too conservative if you want your system running at its best. On a fresh install, Windows typically defaults to Balanced mode, which sounds reasonable but throttles your CPU and other components to save power.
Head to Settings > System > Power & battery and expand the Power mode section. For desktops, and laptops when plugged in, switch to Best performance. Yes, it uses more power, but your system will feel noticeably snappier. For laptops on battery, you might want to keep Balanced mode or even Best power efficiency, depending on your needs.
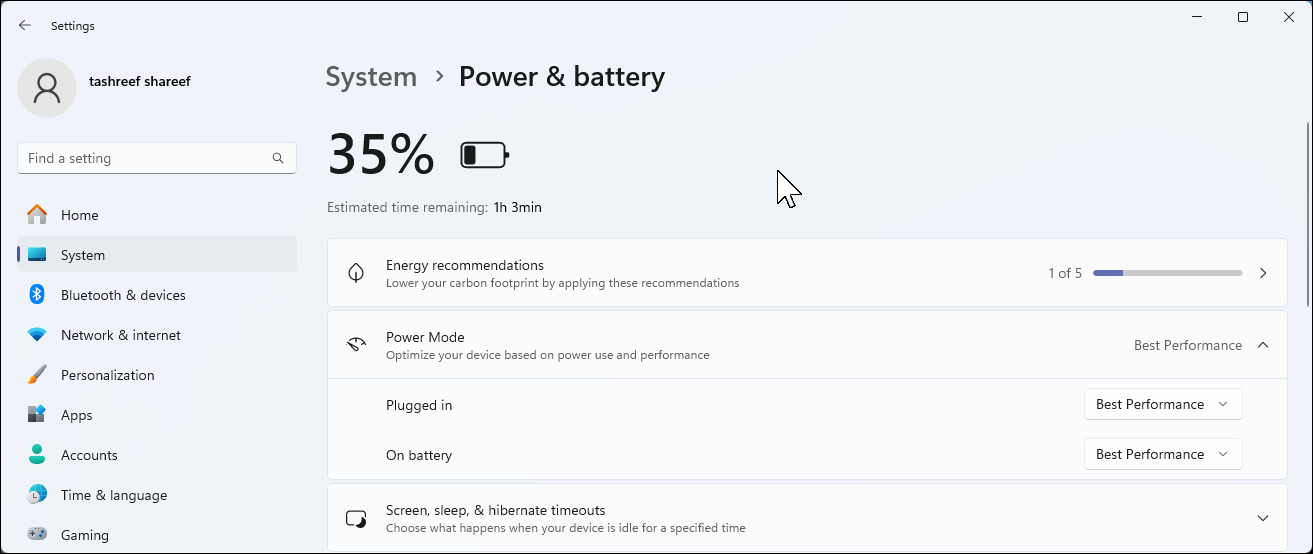
Also, check the Energy Saver settings while you’re there. By default, it kicks in at 20% battery, which might be too aggressive if you’re near a charger. I’ve found these Windows 11 settings maximize my laptop’s battery life without sacrificing too much performance.
2
Turn Off Unnecessary Notifications
Fresh Windows 11 installs come with notifications turned up to eleven. Every app wants to tell you something, from news updates to tips about features you’ll never use. After a few days, the constant pinging becomes maddening.
Go to Settings > System > Notifications and start pruning. Turn off Show me the Windows welcome experience and Get tips and suggestions right away—these are just ads disguised as “helpful tips.” Then go through the app list below and disable notifications for anything non-essential. I keep notifications for communication apps, calendar, and security tools, but everything else gets muted.
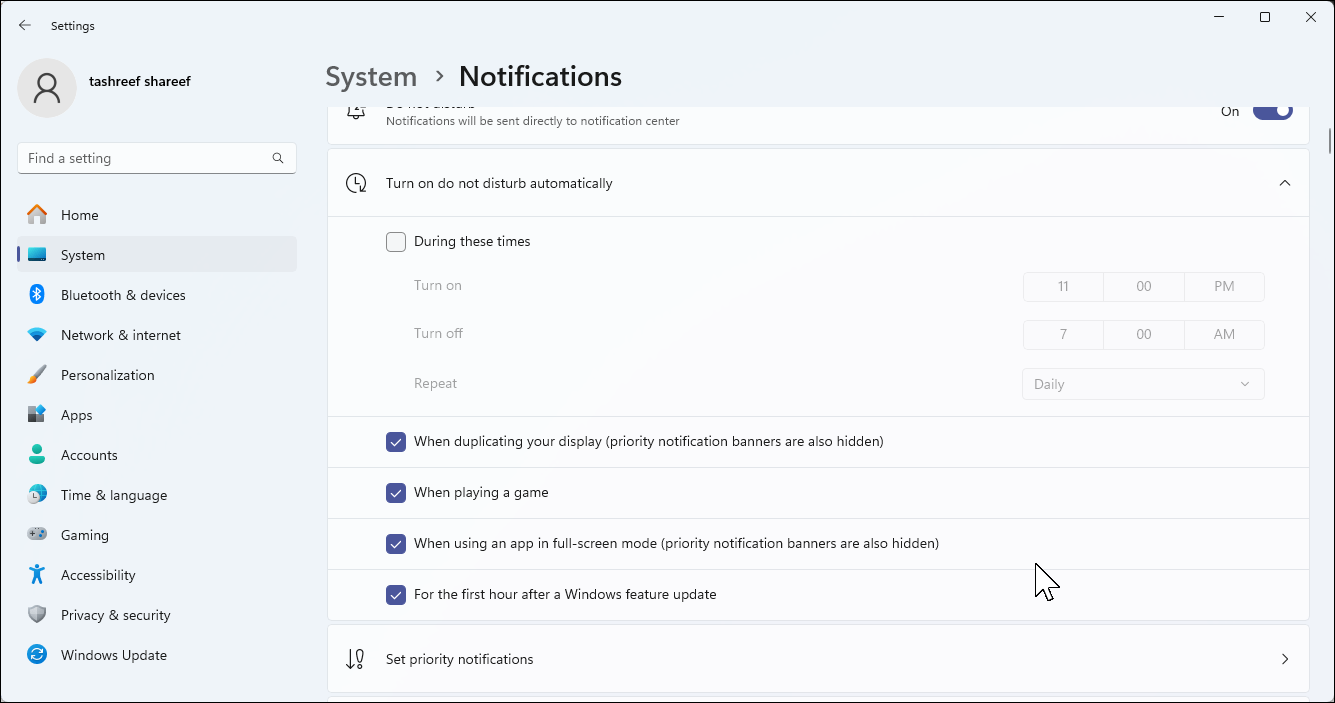
These are just the basics of notification control. For more advanced options like setting up Focus Assist profiles, choosing priority contacts, and creating time-based rules, check out our detailed guide on taming Windows 11 notifications.
1
Review Privacy Settings
Microsoft’s default privacy settings are, let’s say, generous with their data collection. A fresh install opts you into pretty much everything: diagnostic data, tailored experiences, advertising ID tracking, and more. While some of this data helps improve Windows, you might want to dial it back.
Go to Settings > Privacy & security and work your way through each section. Under General, I turn off everything except Let websites show me locally relevant content. Under Diagnostics & feedback, switch from Optional diagnostic data to Required diagnostic data only.
Don’t forget about app permissions too—camera, microphone, location, and more—you should review which apps have access to what. You’d be surprised how many apps request permissions they don’t actually need.
These steps turn a vanilla Windows 11 reinstallation into a properly configured, secure system. Yes, it takes about 20-30 minutes to work through everything, but it’s time well spent. You’ll avoid potential issues like losing access to encrypted files, enjoy better performance, and have peace of mind knowing your system can recover from problems.
Meanwhile, there are so many other ways to improve your Windows 11 experience, including fixes for the most annoying Windows 11 features. Your future self will thank you for taking the time to make your system better now.


