The whole concept of encryption once intimidated me with all those technical terms flying around. But after diving in and actually trying it myself, I discovered that encryption is surprisingly simple to use and incredibly practical for everyday life.
How Encryption Works
Encryption keeps your data safe by transforming it into a code that only someone with the correct password or key can decipher. When you encrypt a file or message, you scramble the information so that it appears as nonsense to anyone else. Only people with the right key can turn it back into something readable, which protects your private data, whether you’re sending it or just storing it.
Alongside encryption, hashing is another important process often used in data security. Instead of locking and unlocking information, hashing creates a unique fingerprint for your data. It takes your information and runs it through an algorithm, giving you a string of numbers and letters that represent the original. You can’t use a hash to recover the original data, but you can use it to verify if something has changed. For example, if you download a file, you can compare its hash to the original to ensure that nothing has been tampered with.
In short, encryption keeps your information private and allows you to unlock it later with the right key. Hashing helps verify that your data hasn’t been altered. Both work quietly in the background, and you don’t need to understand all the technical details to benefit from them.
Today, there are many tools available for encrypting, decrypting, hashing, and managing keys to help keep your data secure. Here are some of my top picks for easily encrypting my files, flash drives, and emails.
Quickly Encrypting My Archives with 7-Zip
I picked up 7-Zip because it’s free, reliable, and usually already on most Windows computers. Encrypting files with it was a lot easier than I expected, and now I use it any time I want to keep files and documents private before storing or sending them to someone.
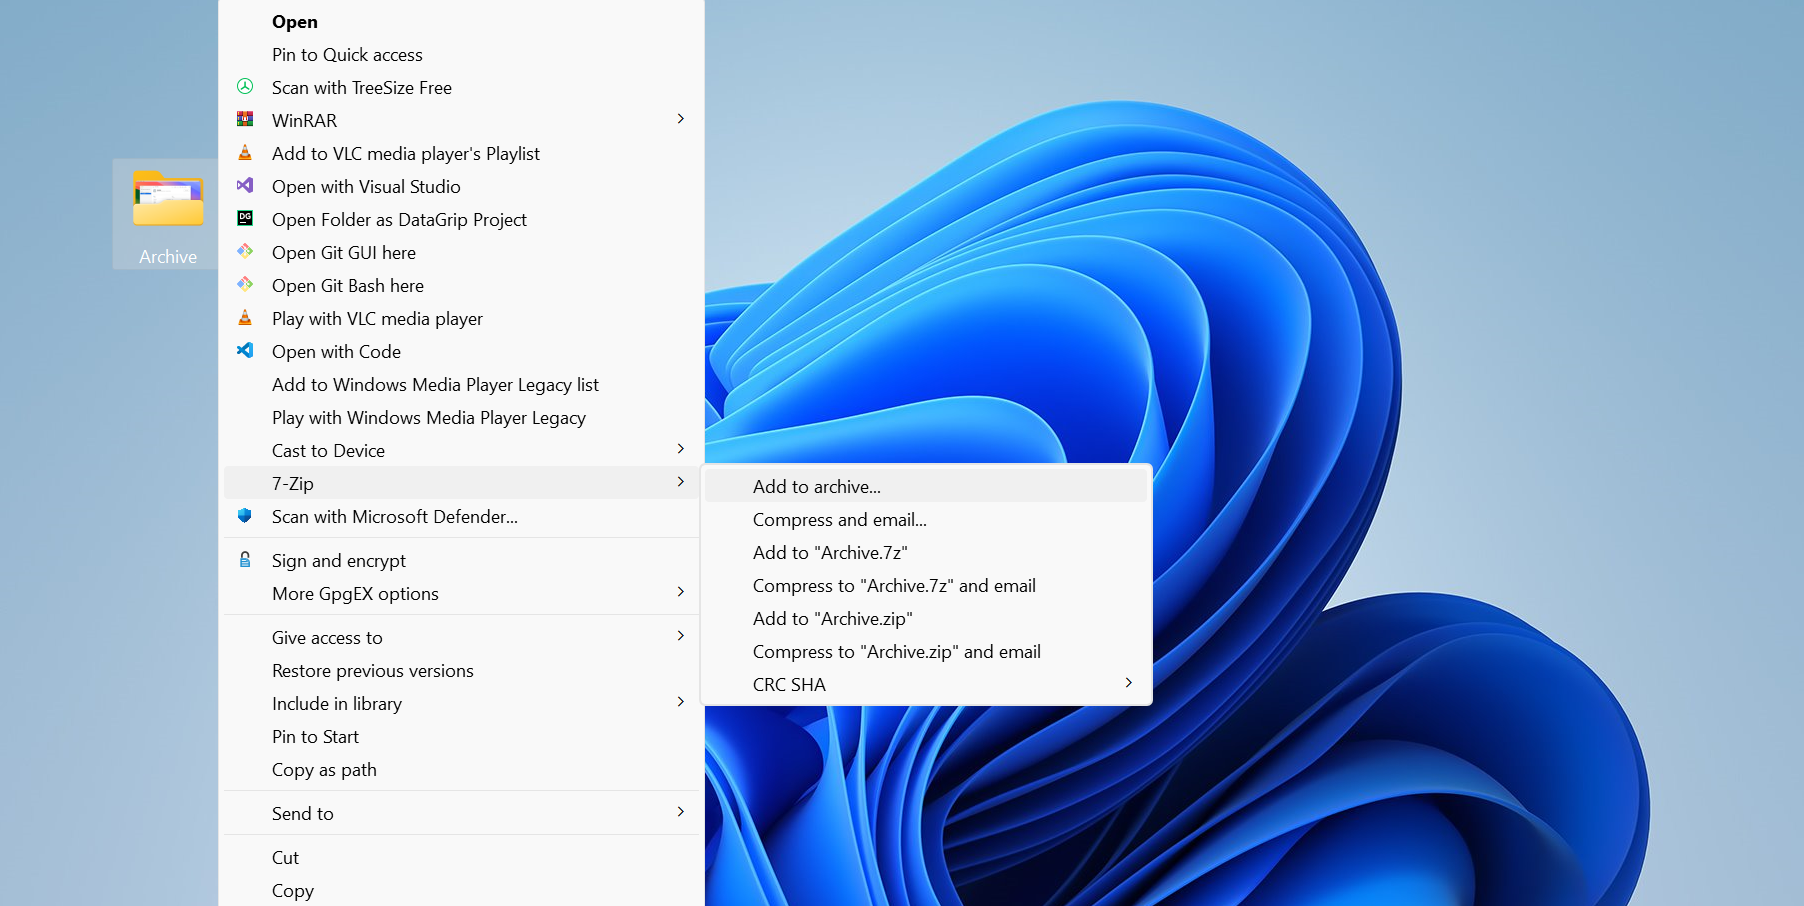
Here’s how I do it. I right-click on the file or folder I want to protect, then choose 7-Zip and pick Add to archive. In the window that pops up, I always switch the archive format from ZIP to 7z. The 7z format provides stronger security and enhanced encryption features compared to the default ZIP format.
Next, I set a password. I make sure to use one that’s at least 12 characters long, mixing upper and lowercase letters, numbers, and symbols. A strong password is crucial. Remember, no matter how good the encryption is, a weak password can ruin it.
I also check the box for Encrypt file names. This hides not just the contents of your files, but even their names. If you skip this, someone could still see what the files are called, even if they can’t open them.
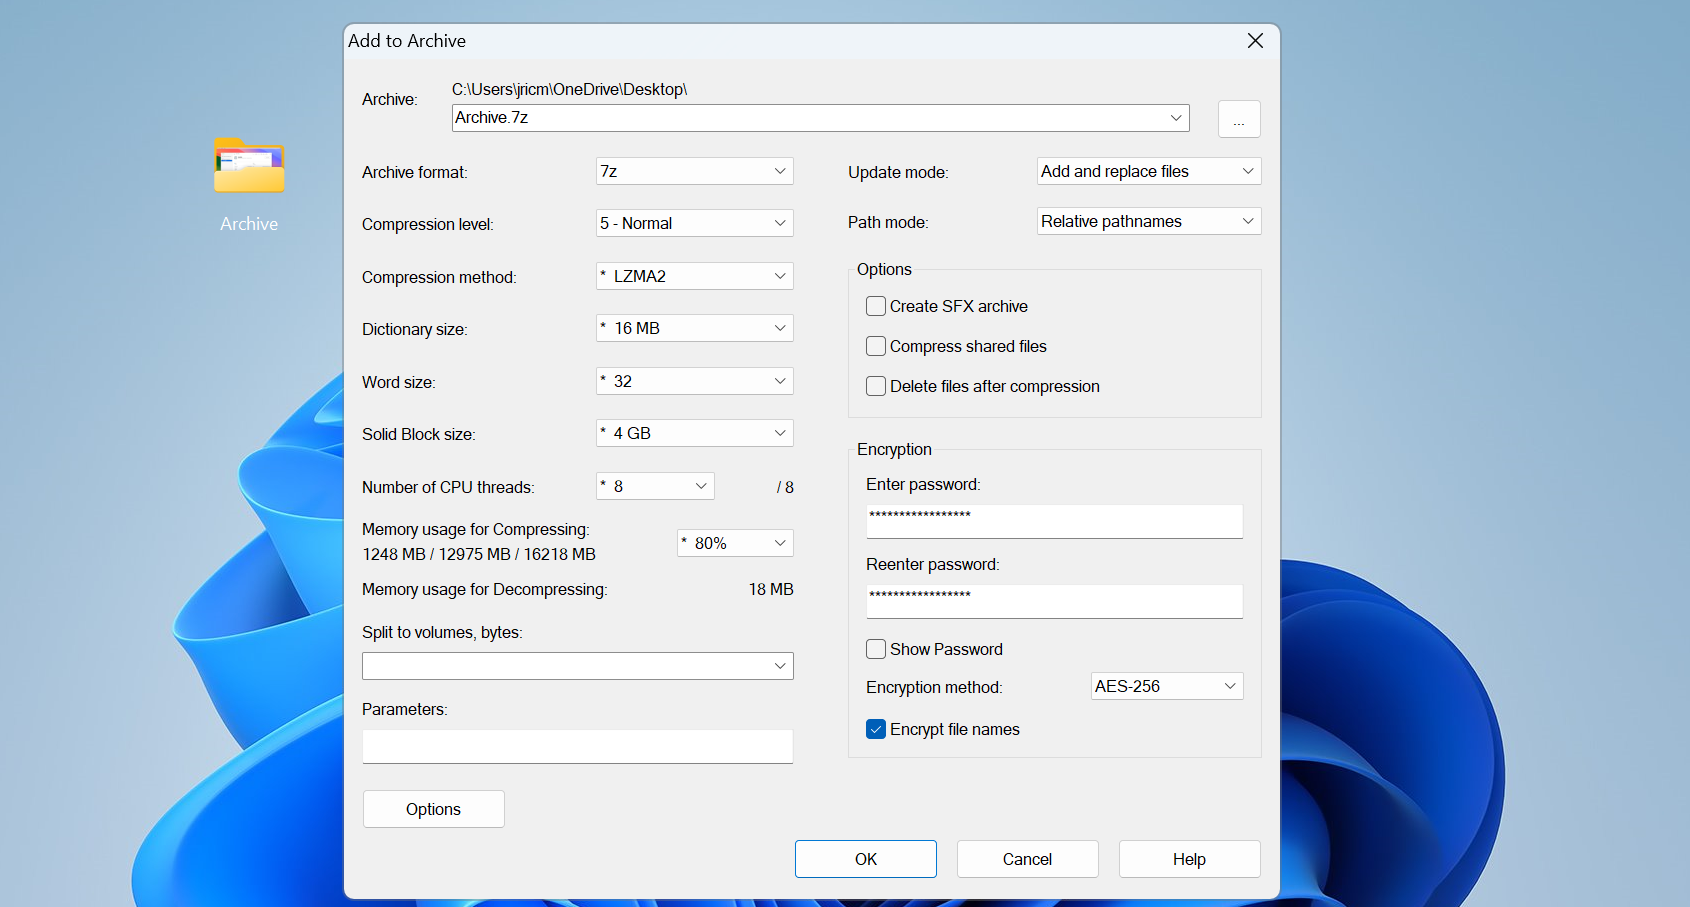
The encryption method is set to AES-256 by default, which is the same standard used by government agencies. I stick with this because it’s proven and doesn’t slow things down.
After clicking OK, 7-Zip creates the encrypted archive in the same folder as my original files. It usually takes just a few seconds. I always test my encrypted archives by trying to open them, just to make sure I remember the password and everything works.
To boost my security, I never send the encrypted file and the password through the same channel. If I email someone the archive, I’ll share the password by phone or text. That way, even if someone intercepts the email, they can’t get into the files.
Once you get the hang of it, encrypting with 7-Zip becomes second nature. It’s a simple way to keep your private files truly private.
Encrypting Flash Drives with BitLocker
After learning how to encrypt my hard drive with BitLocker, I realized I also needed to encrypt my flash drives, as I had lost one too many over the years. These small devices are easy to misplace, and I didn’t want anyone stumbling through my personnel files. BitLocker, which comes built into Windows, turned out to be the simplest way to keep everything on my drives safe.
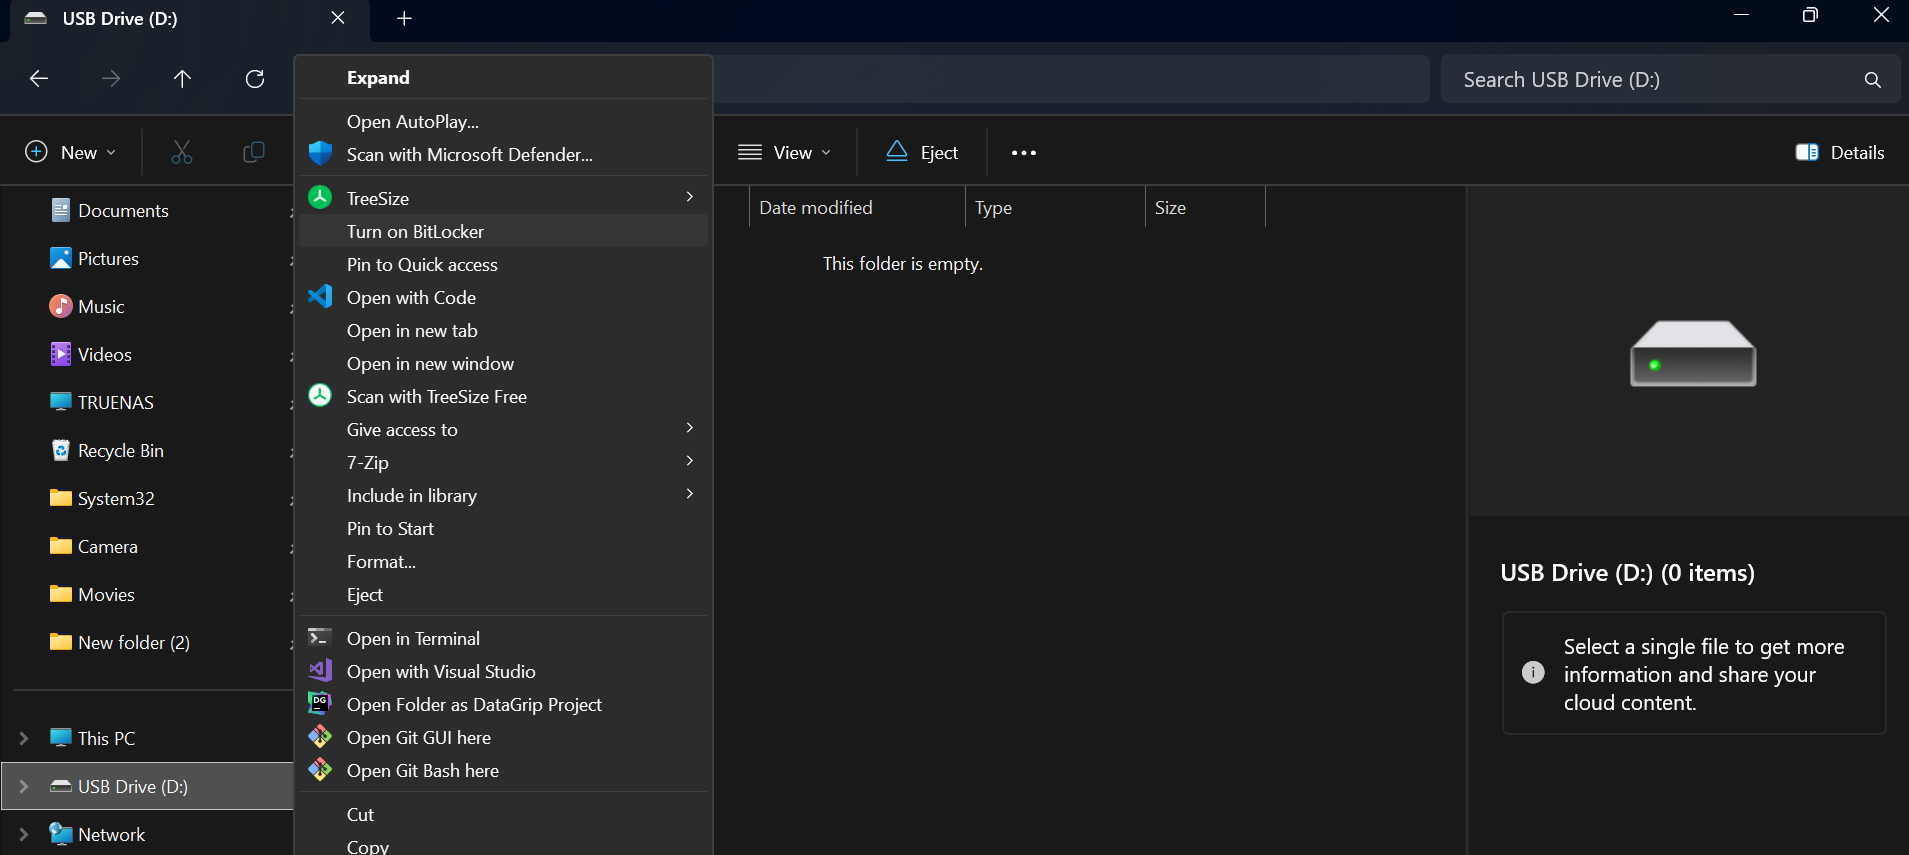
Setting up BitLocker is pretty straightforward. I plugged in my flash drive and opened File Explorer. Then I right-click the drive and choose Turn on BitLocker. On Windows 11, I sometimes have to click Show more options to see this choice.
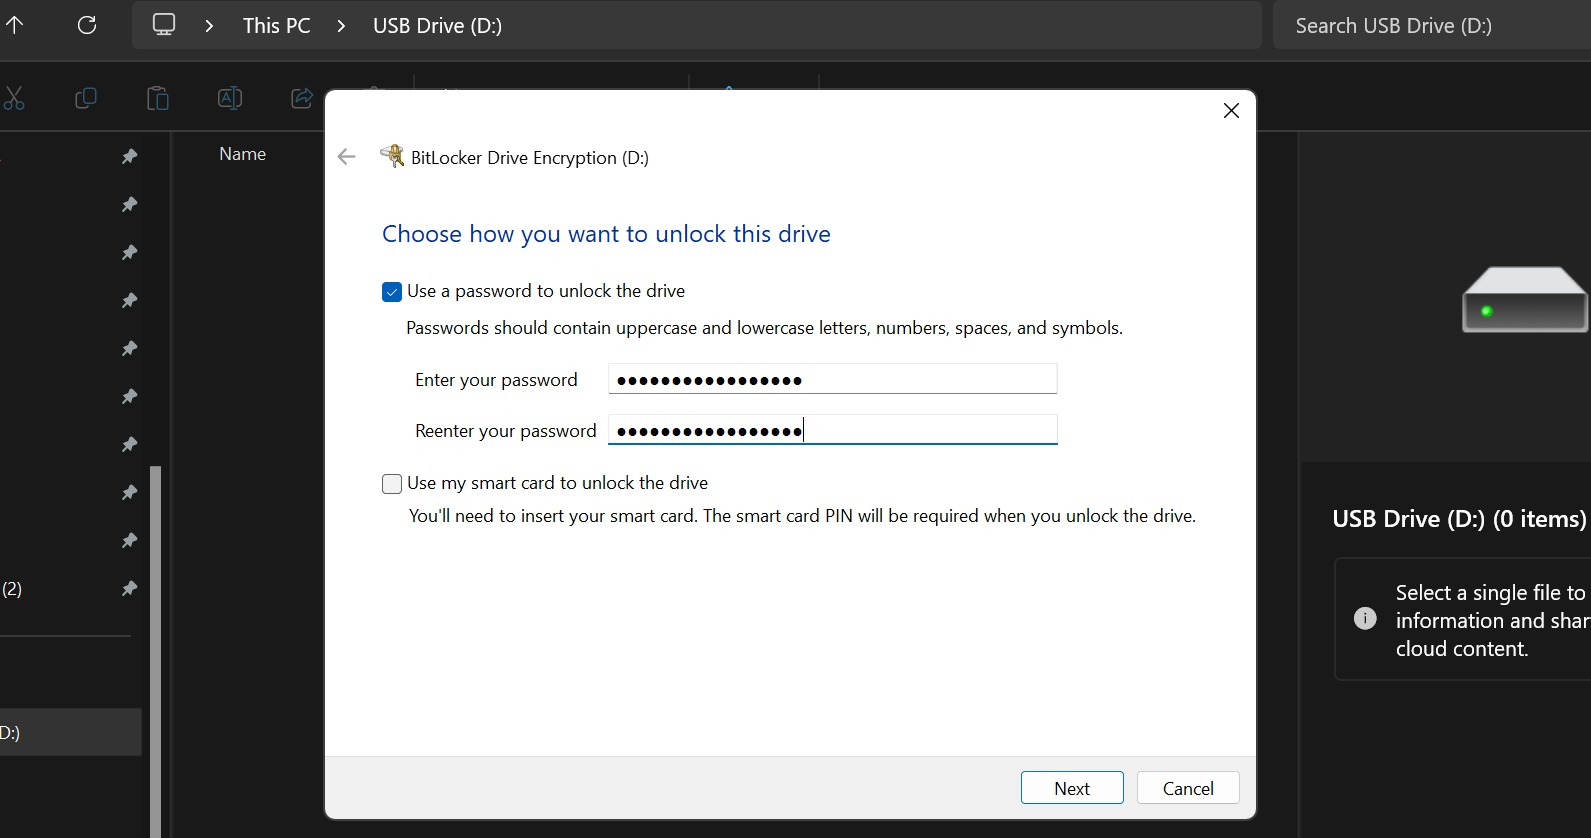
BitLocker prepares the drive for encryption, which typically takes just a minute or two. After that, it asks me to set a password. I always use a strong, unique password that’s different from the ones I use for my accounts. Since I’ll need to type this password every time I unlock the drive, I make sure it’s something I can remember but still hard to guess.
Next, BitLocker asks where I want to save my recovery key. This key is important. If I ever forget my password, the recovery key is the only way to recover my files. I save it in a safe location, such as my cloud storage or a printed copy stored at home.
BitLocker then lets me pick how much of the drive to encrypt. For a new drive, I opt for encrypting used space only, as it’s faster. If the drive already has files on it, I choose to encrypt the entire drive to make sure nothing is left unprotected.
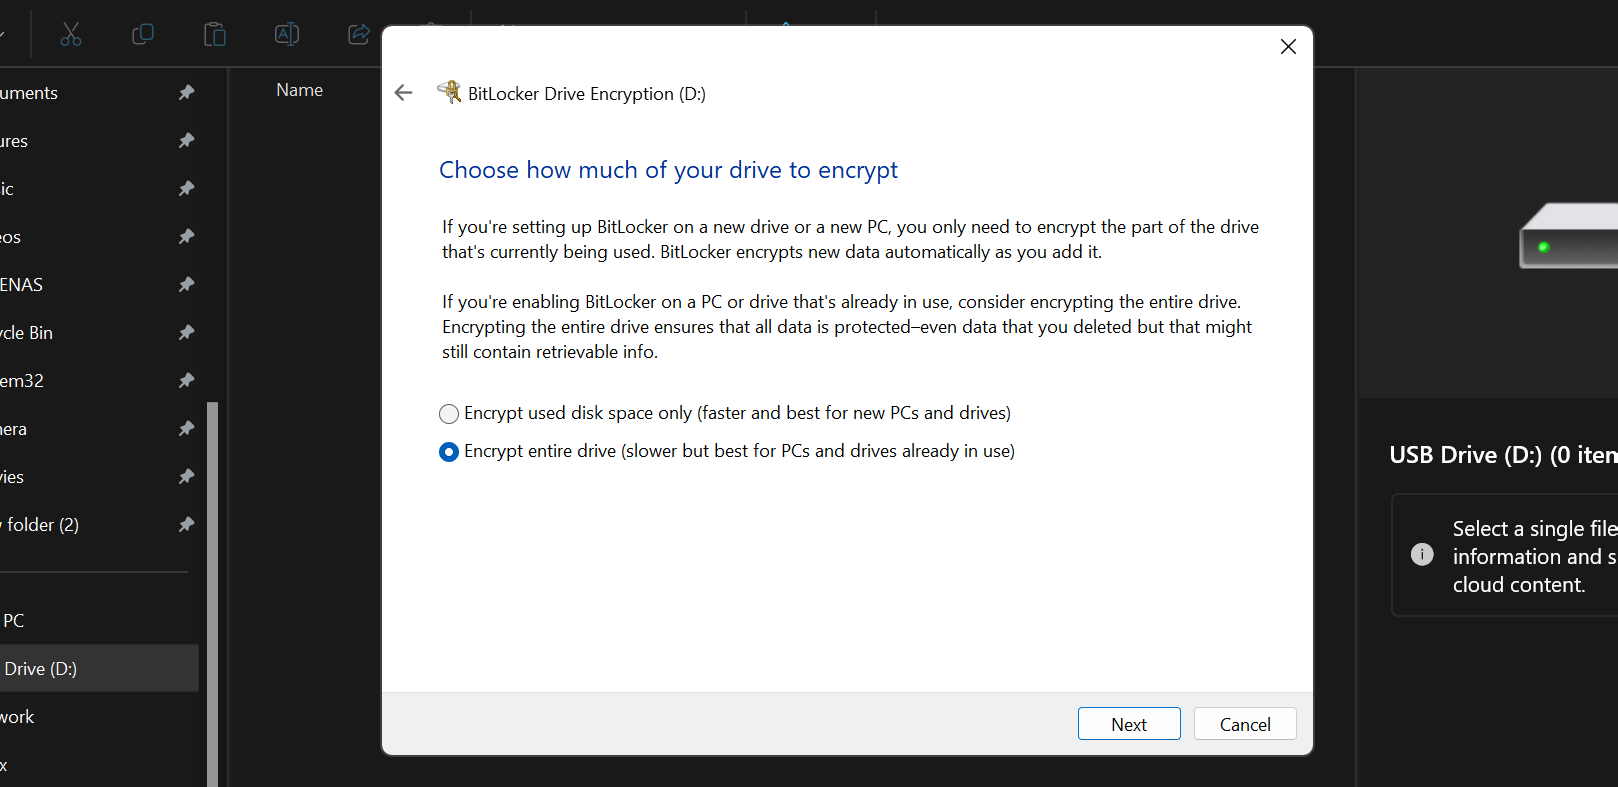
There’s also an option for encryption compatibility. I always pick Compatible Mode, so the drive works on any Windows computer, not just the latest ones. This saves me headaches if I need to use the drive on an older machine.
Once I confirm everything, BitLocker starts encrypting. For bigger drives, this can take a little while, but I can keep using my computer during the process. When it’s done, I’ll see a lock icon on the drive in File Explorer, showing that it’s protected.
After setup, using an encrypted drive is easy. When I plug it into a Windows computer, BitLocker asks for my password. I can also set it to unlock automatically on my main PC, but I’m careful with this since it lowers security.
Ease-of-use is probably one of the biggest reasons I use BitLocker. It’s so easy that I don’t really have any reason not to encrypt my personal flash drives. Now, even if I lose a drive, I know my files are protected and my personal data cannot be easily accessed outside my Windows machine.
How I Encrypt My Email with PGP
When I want my messages to stay completely private, even from email providers, I use PGP encryption with Kleopatra. There are other ways to send PGP-encrypted emails on Linux, but I choose Kleopatra since I’m using Windows. It takes a little more effort to set up, but once you get the hang of it, the process is straightforward and gives you true end-to-end privacy.
First, I download and install the Gpg4win package, which includes Kleopatra. After opening Kleopatra, I create my own key pair by entering my name, email, and a strong passphrase. Kleopatra generates two keys for me: a public key that I can share with anyone who wants to send me encrypted messages, and a private key that I keep safe on my computer.
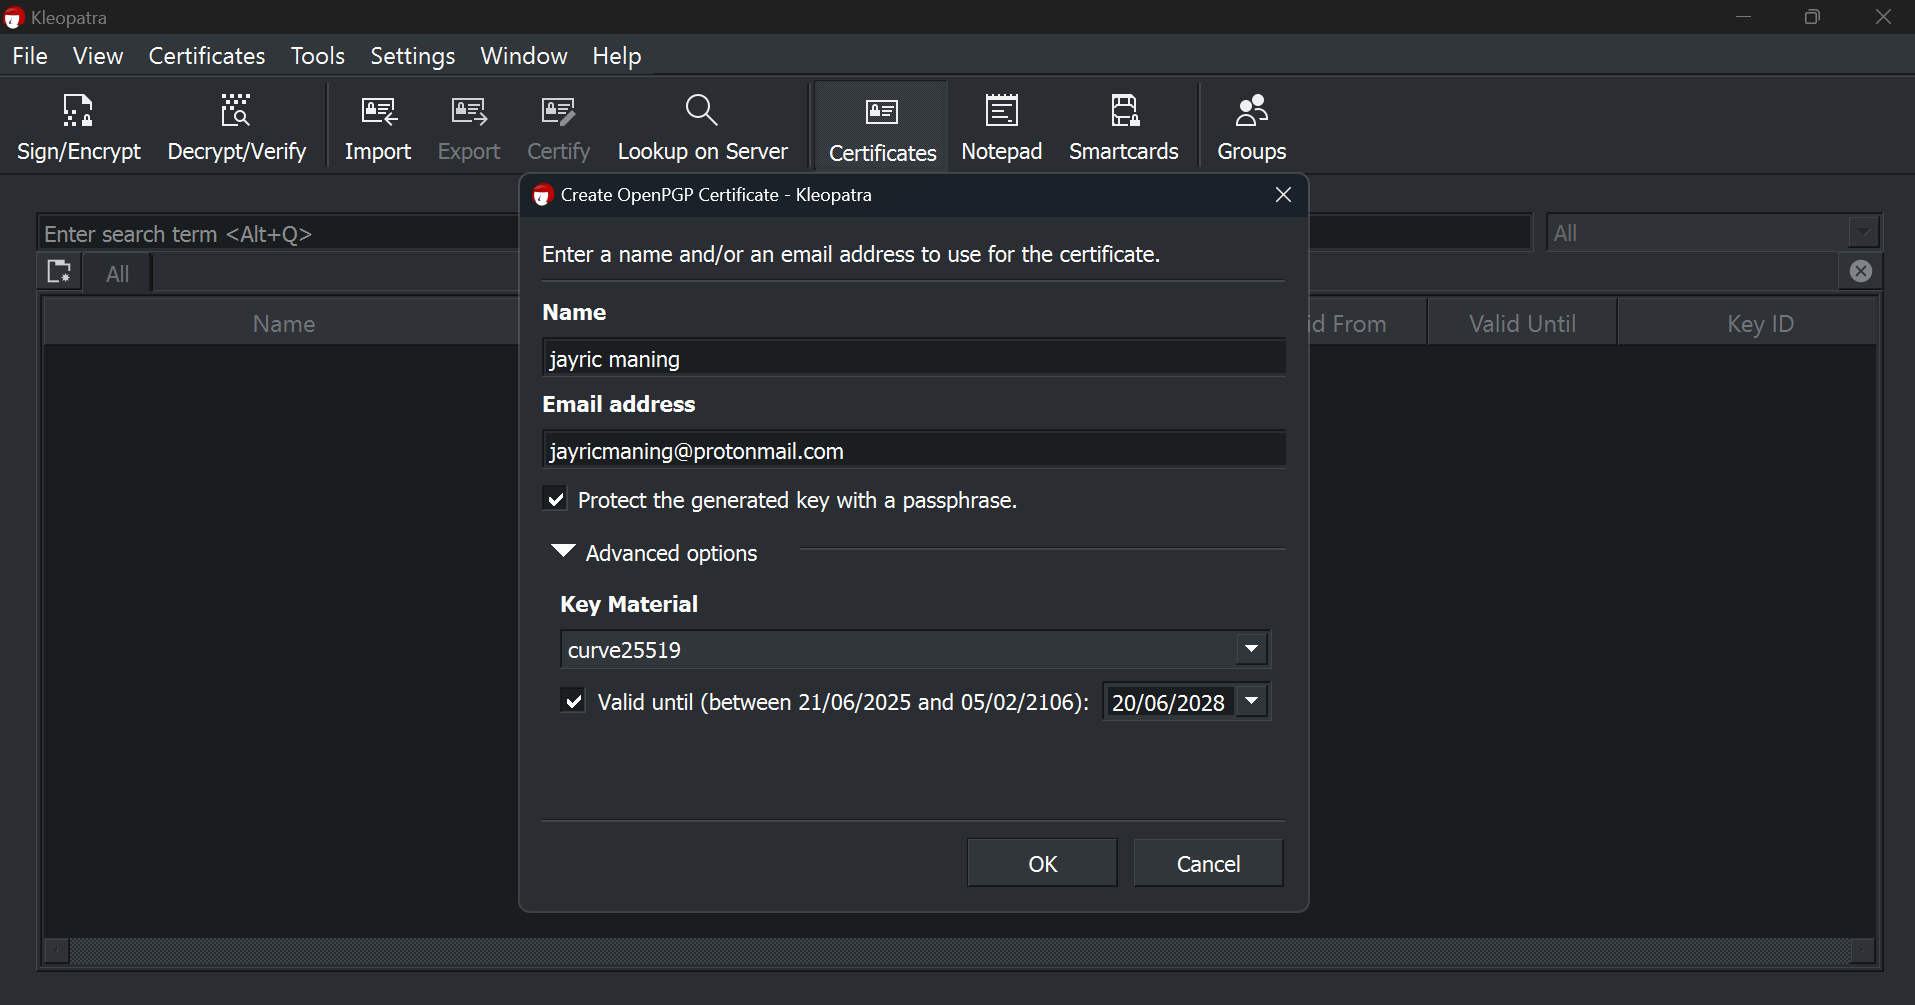
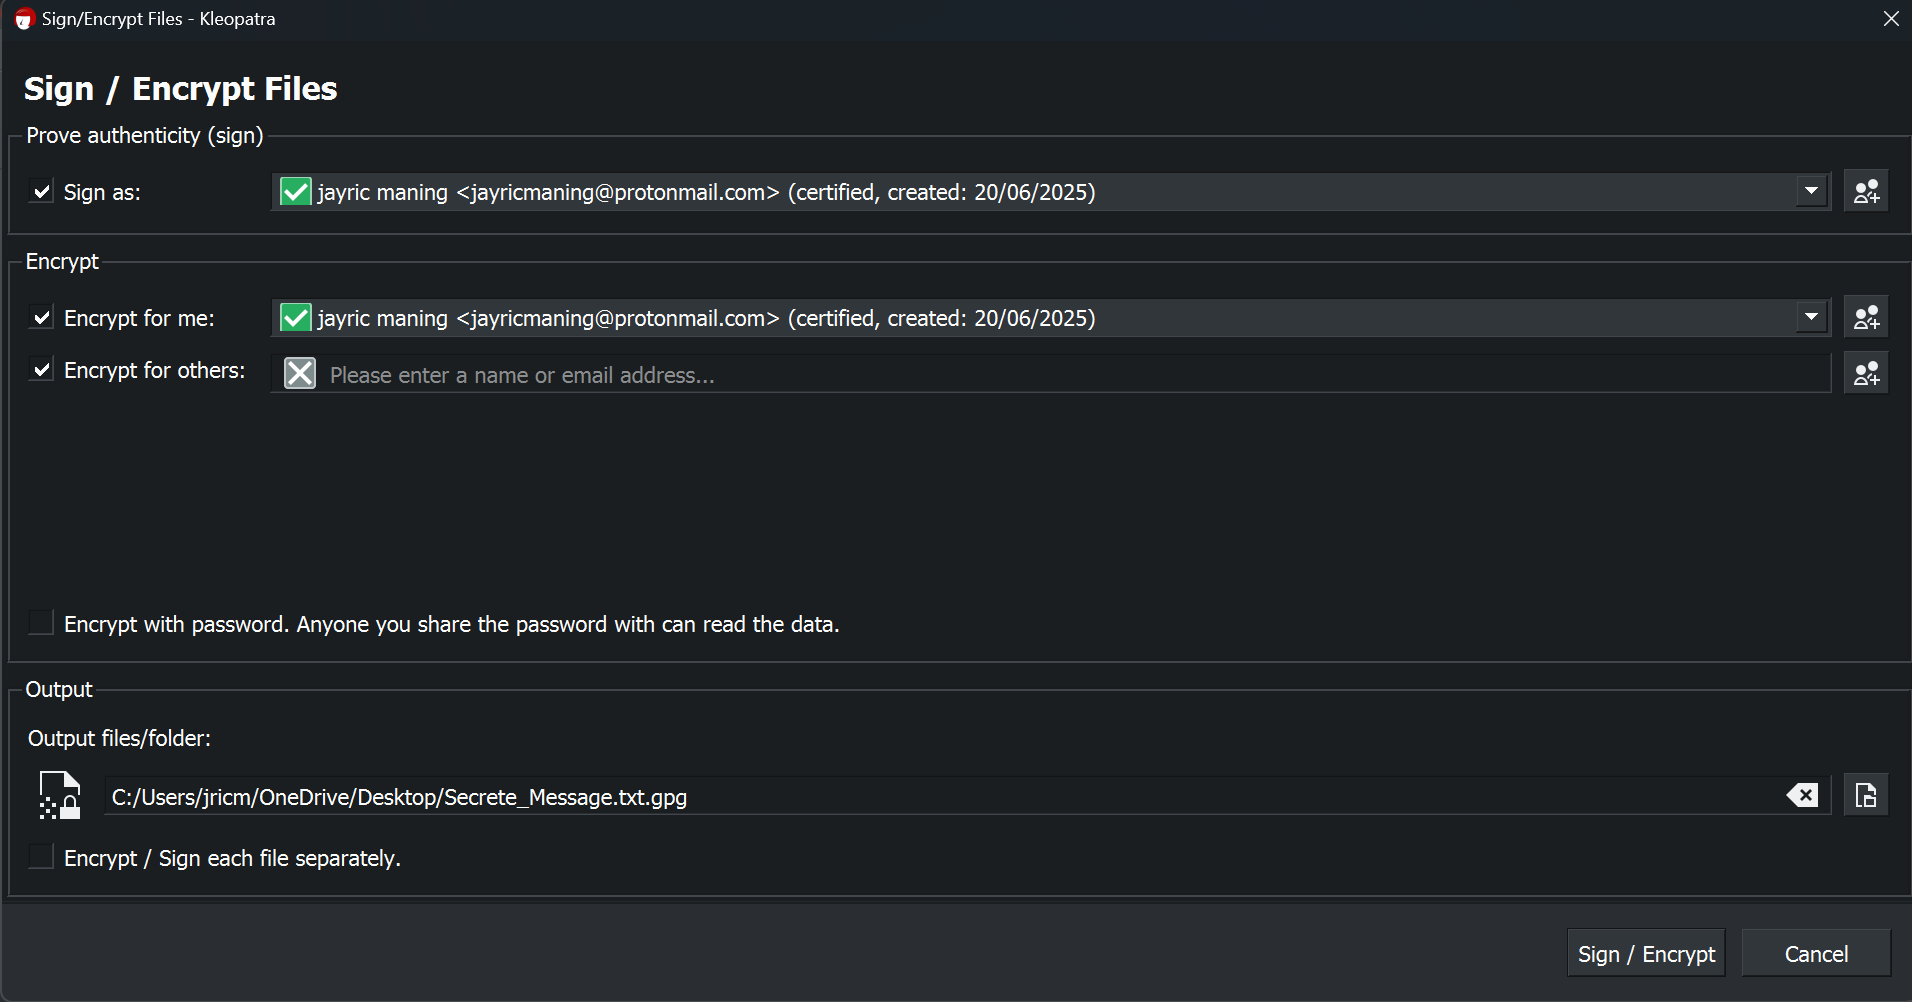
When I want to send an encrypted message, I usually write it in Notepad. Then, in Kleopatra, I click the Sign/Encrypt button and select the text file with my message. I check the box to Encrypt with password and enter a password that I’ll share with my recipient. After clicking Encrypt, Kleopatra creates a new PGP-encrypted file.
I can send this encrypted file via email. To open it, the recipient just needs Kleopatra and the password I set. They right-click the PGP file, choose Open with Kleopatra, and enter the password. Kleopatra then decrypts the file and shows the original message.
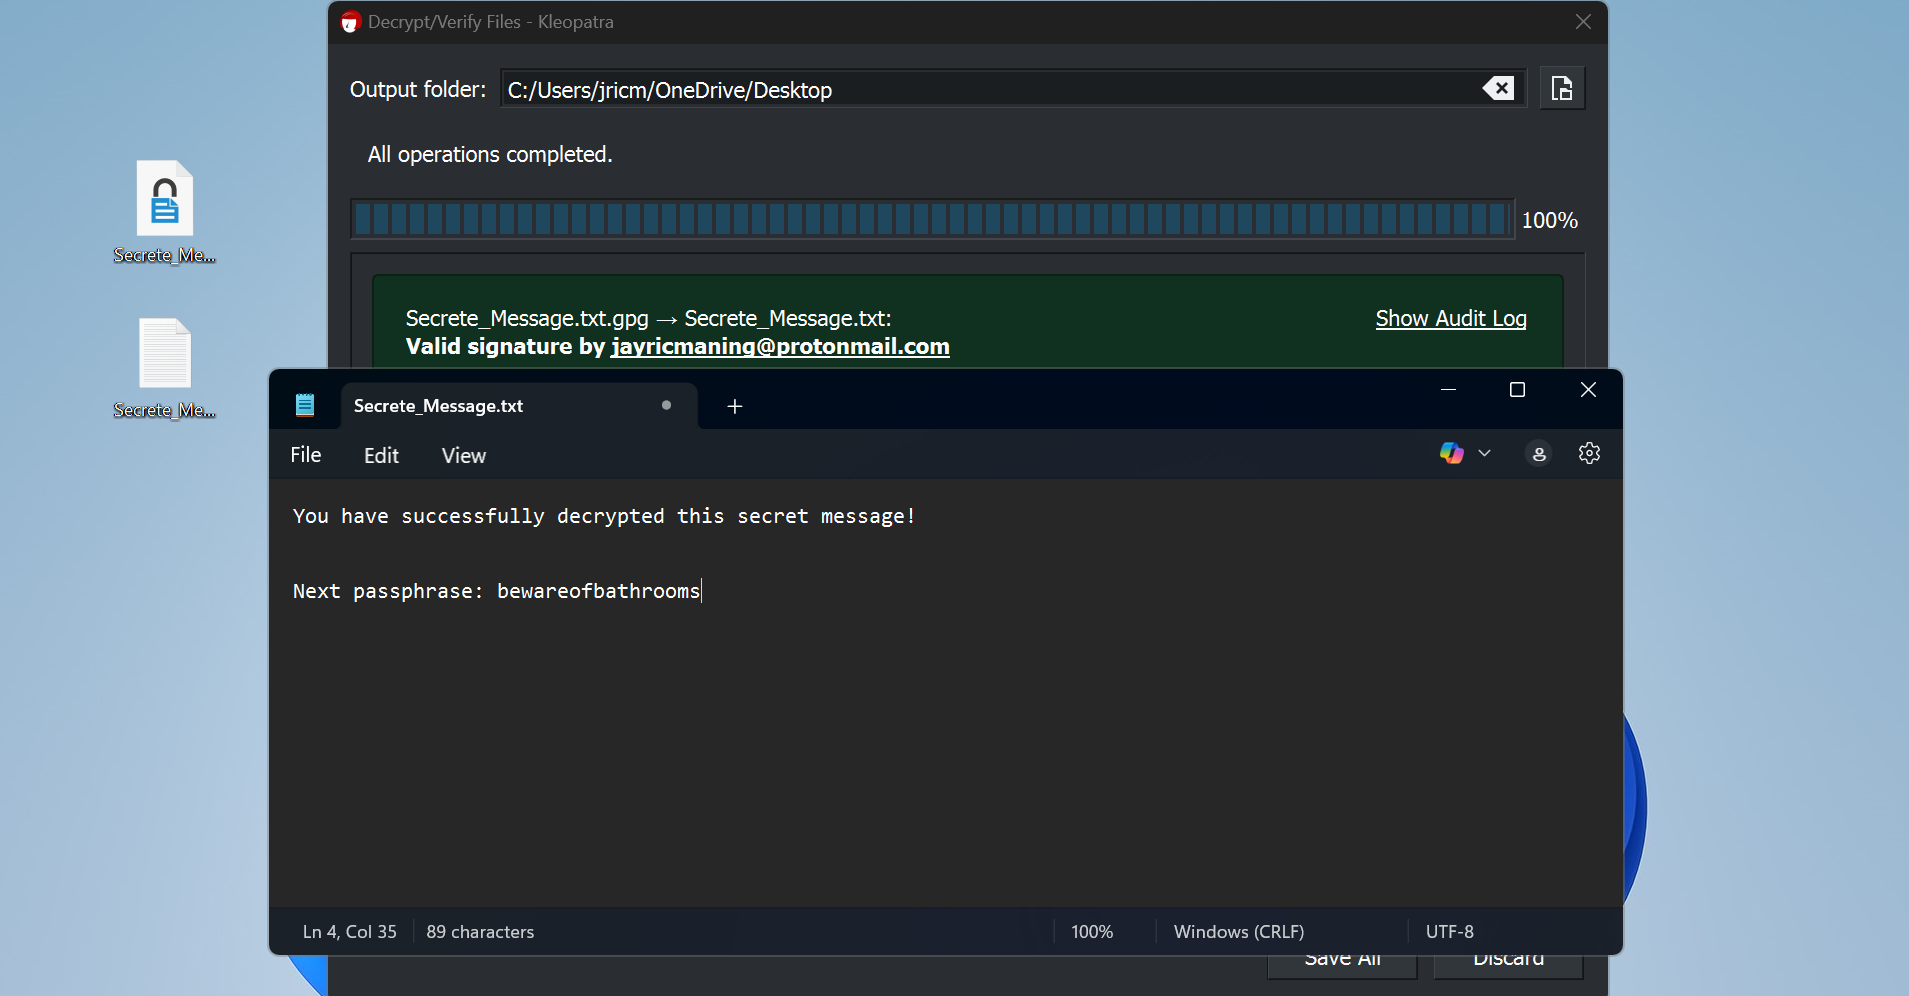
Both people need to have Kleopatra or a similar PGP tool, and they need to know the password or passphrase. To share the passphrase securely, I can inform my recipient through a meetup or a secure call (using Signal or WhatsApp), and then attach a new passphrase for each PGP file I send.
Aside from simple messages, PGP can also be used to encrypt all kinds of files, such as PDFs, audio recordings, videos, and software. So, things like legal papers, financial records, or your next million-dollar idea are definitely worth encrypting with PGP when sending them through email.
Once I started using these tools in my daily routine, I realized how easy it is to keep my private files and messages safe. Whether I’m locking down my archives, protecting flash drives, or sending sensitive emails, encryption now feels like just another simple step to protect my digital life. If you’ve been hesitant to try it, I can say it’s worth the few minutes it takes to learn. Your future self will thank you for making privacy a habit.


