Windows Security does more than just basic virus protection. It guards against phishing, blocks ransomware, and prevents malicious apps from running. However, these features aren’t easy to spot—they’re hidden behind layers of menus.
Protect Sensitive Files from Ransomware
Downloading files or opening unknown attachments always carries some risk, especially if one turns out to be ransomware that can lock your files in seconds. Luckily, Windows includes a feature called Controlled Folder Access that helps protect your most important folders from exactly that.
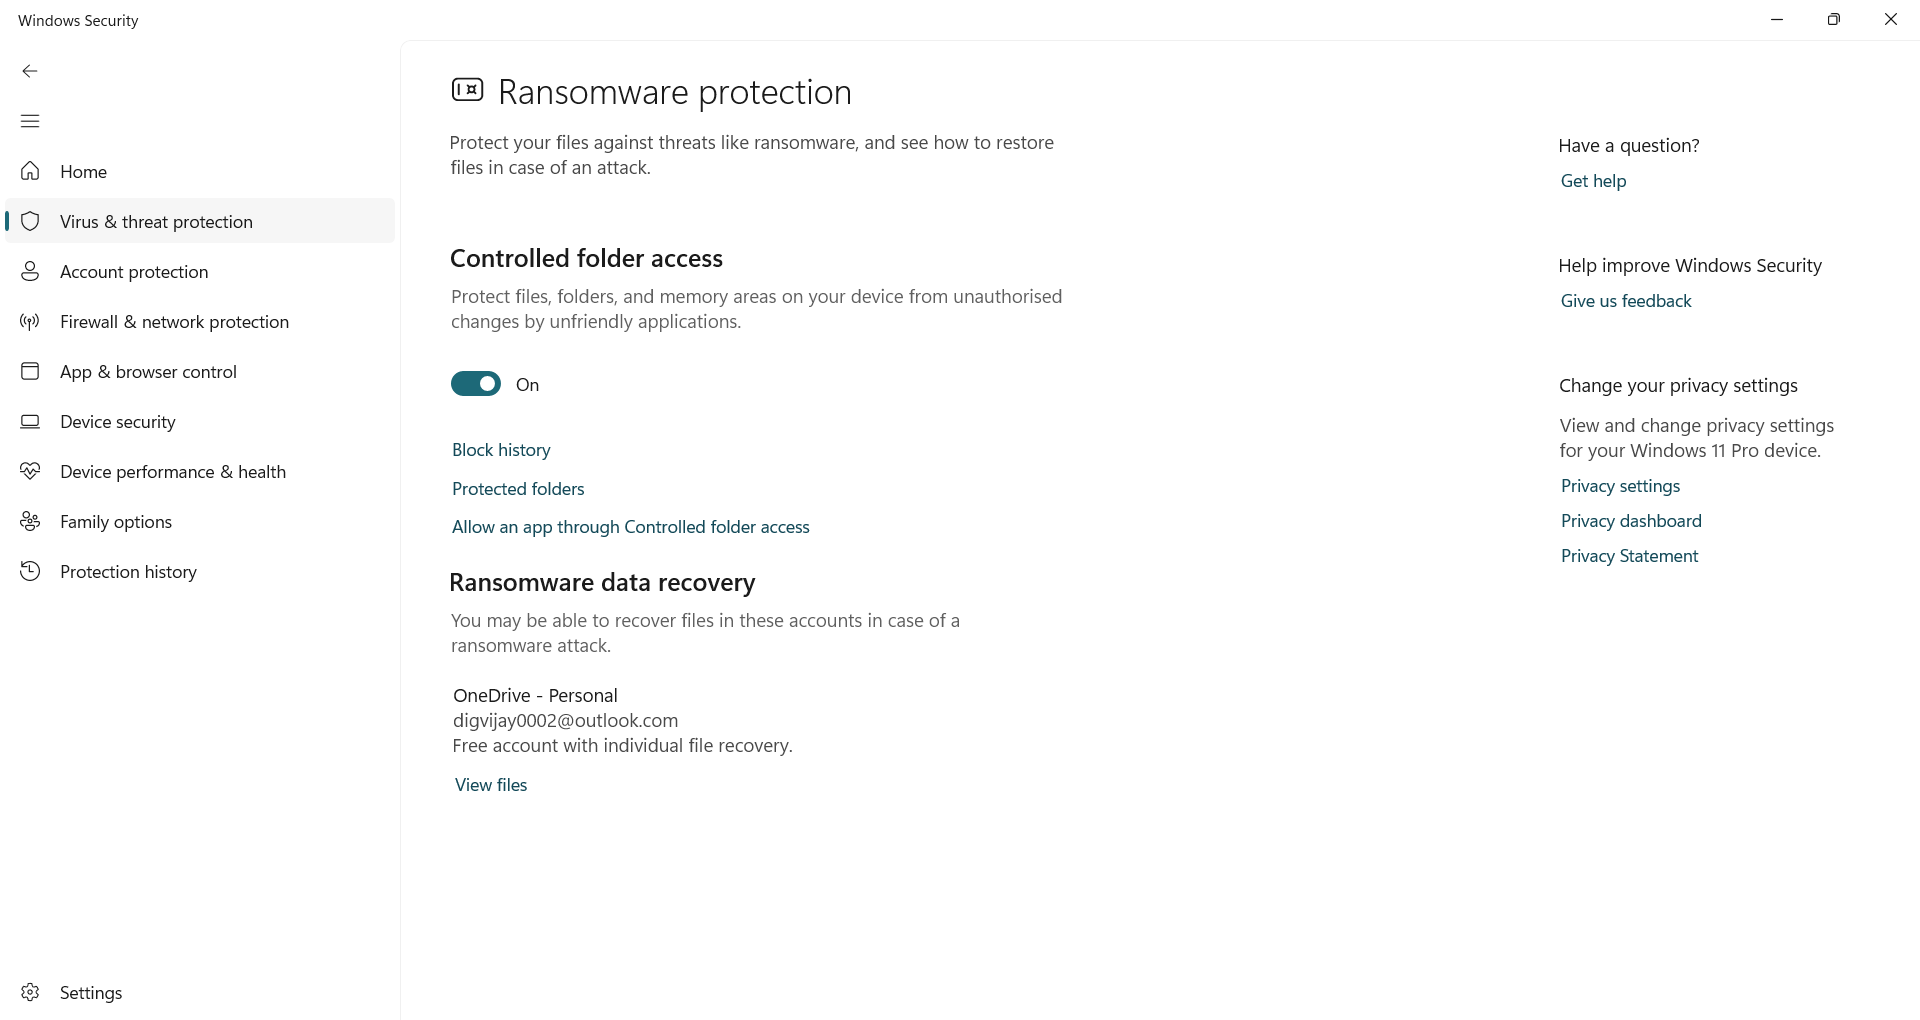
Once enabled, it blocks untrusted apps from modifying protected folders. By default, it covers locations like Documents, Pictures, and Desktop, but you’re not limited to just those. You can click Protected folders to add other locations you care about, such as work projects, financial records, or files stored on an external drive.
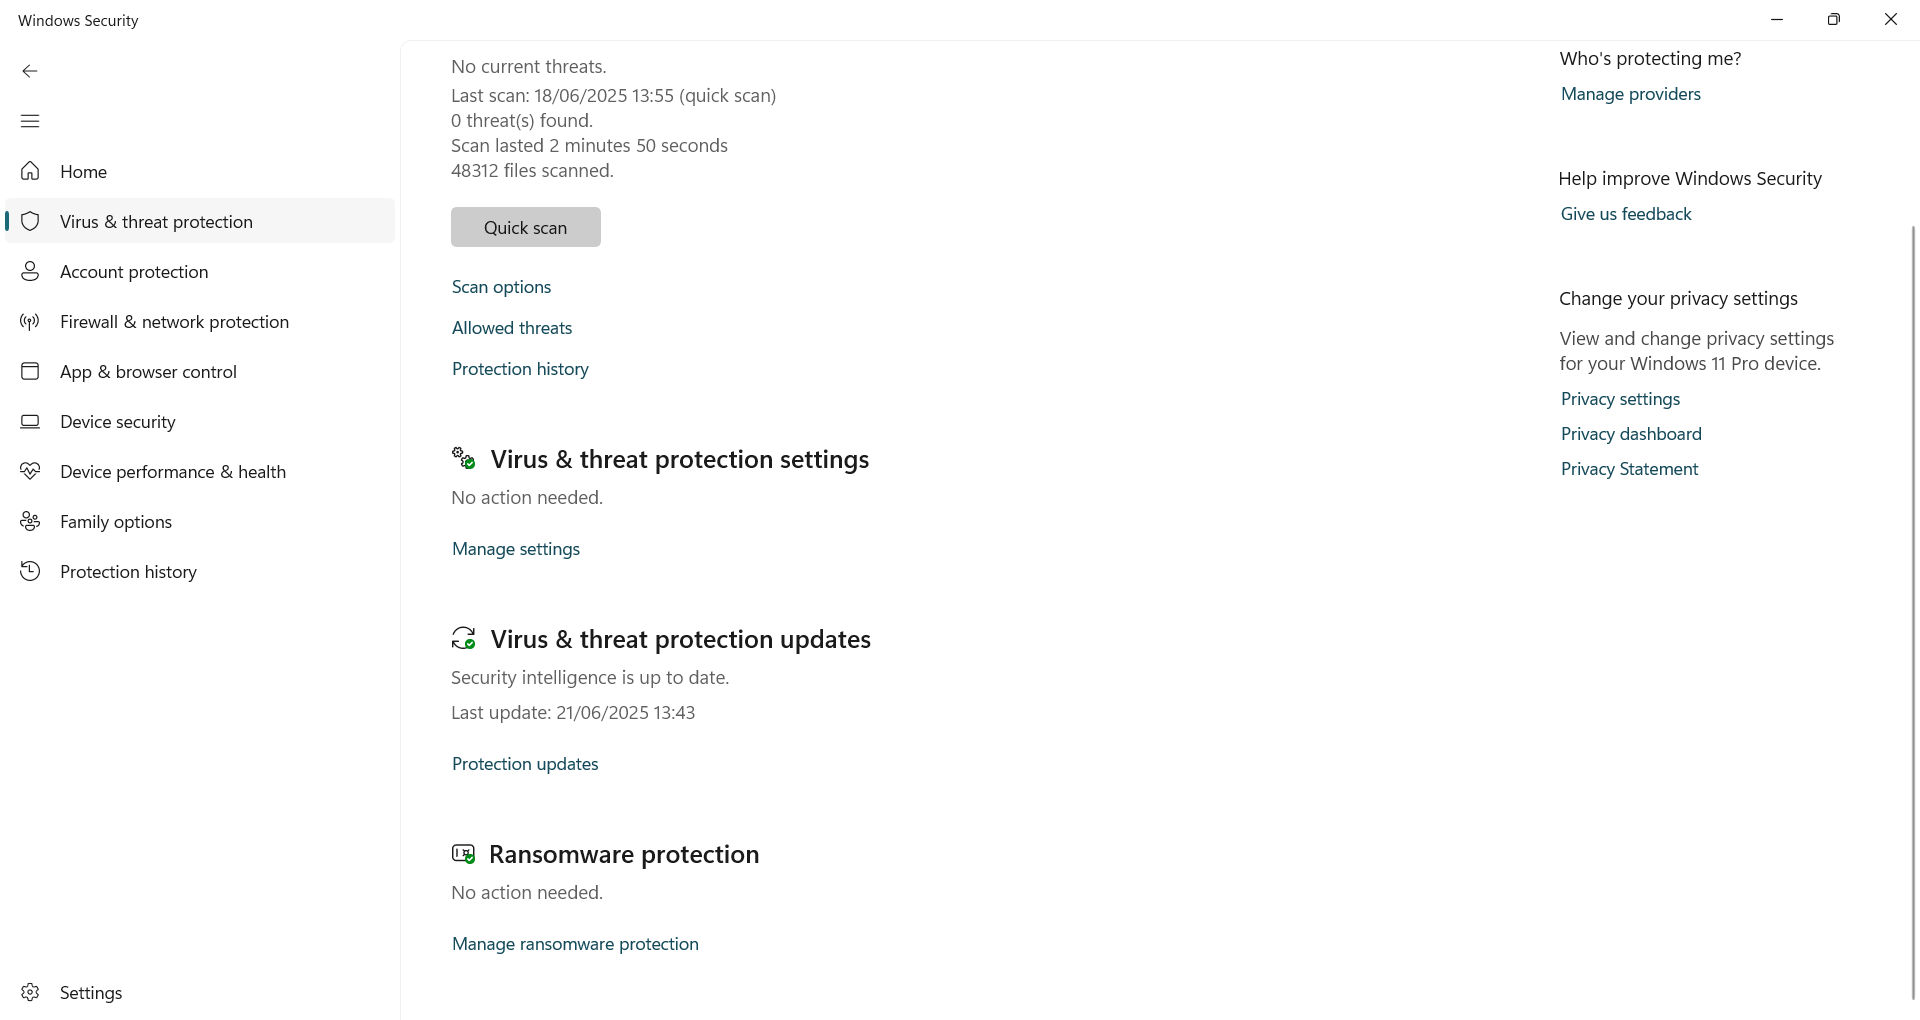
To turn it on, open Windows Security, go to Virus & threat protection, then click Manage ransomware protection under the Ransomware protection section. From there, toggle on Controlled folder access.
If a trusted app gets blocked, Windows often won’t notify you. To find out what was blocked, open the Protection history section, where Windows logs recent attempts to access protected folders. Just look under Blocked folder access and allow any apps you recognize and trust.
And if a known app, such as your video editor or backup tool, encounters problems, you can head straight to Allow an app through Controlled Folder Access to whitelist it and prevent any future interruptions.
Once it’s set up, the protection works quietly in the background. If ransomware or any suspicious app tries to interfere, Windows will block it instantly, keeping your files safe without you lifting a finger.
Block Malicious or Untrusted Apps Automatically
Threats don’t always look suspicious. That file you downloaded might seem useful, but it could install trackers, malware, or otherwise. Even a fake login page can look convincing enough to fool anyone. One wrong click, and your login details could fall into the wrong hands.
Reputation-based protection, built into Windows Security, stops these threats before they reach you. Using Microsoft’s real-time threat intelligence, it blocks shady apps, suspicious downloads, and phishing sites, so you don’t have to second-guess every click.
To turn it on, open Windows Security and go to App & browser control. Click Reputation-based protection settings, then turn on all available options: Check apps and files, SmartScreen for Microsoft Edge, Potentially unwanted app blocking, and Phishing protection.
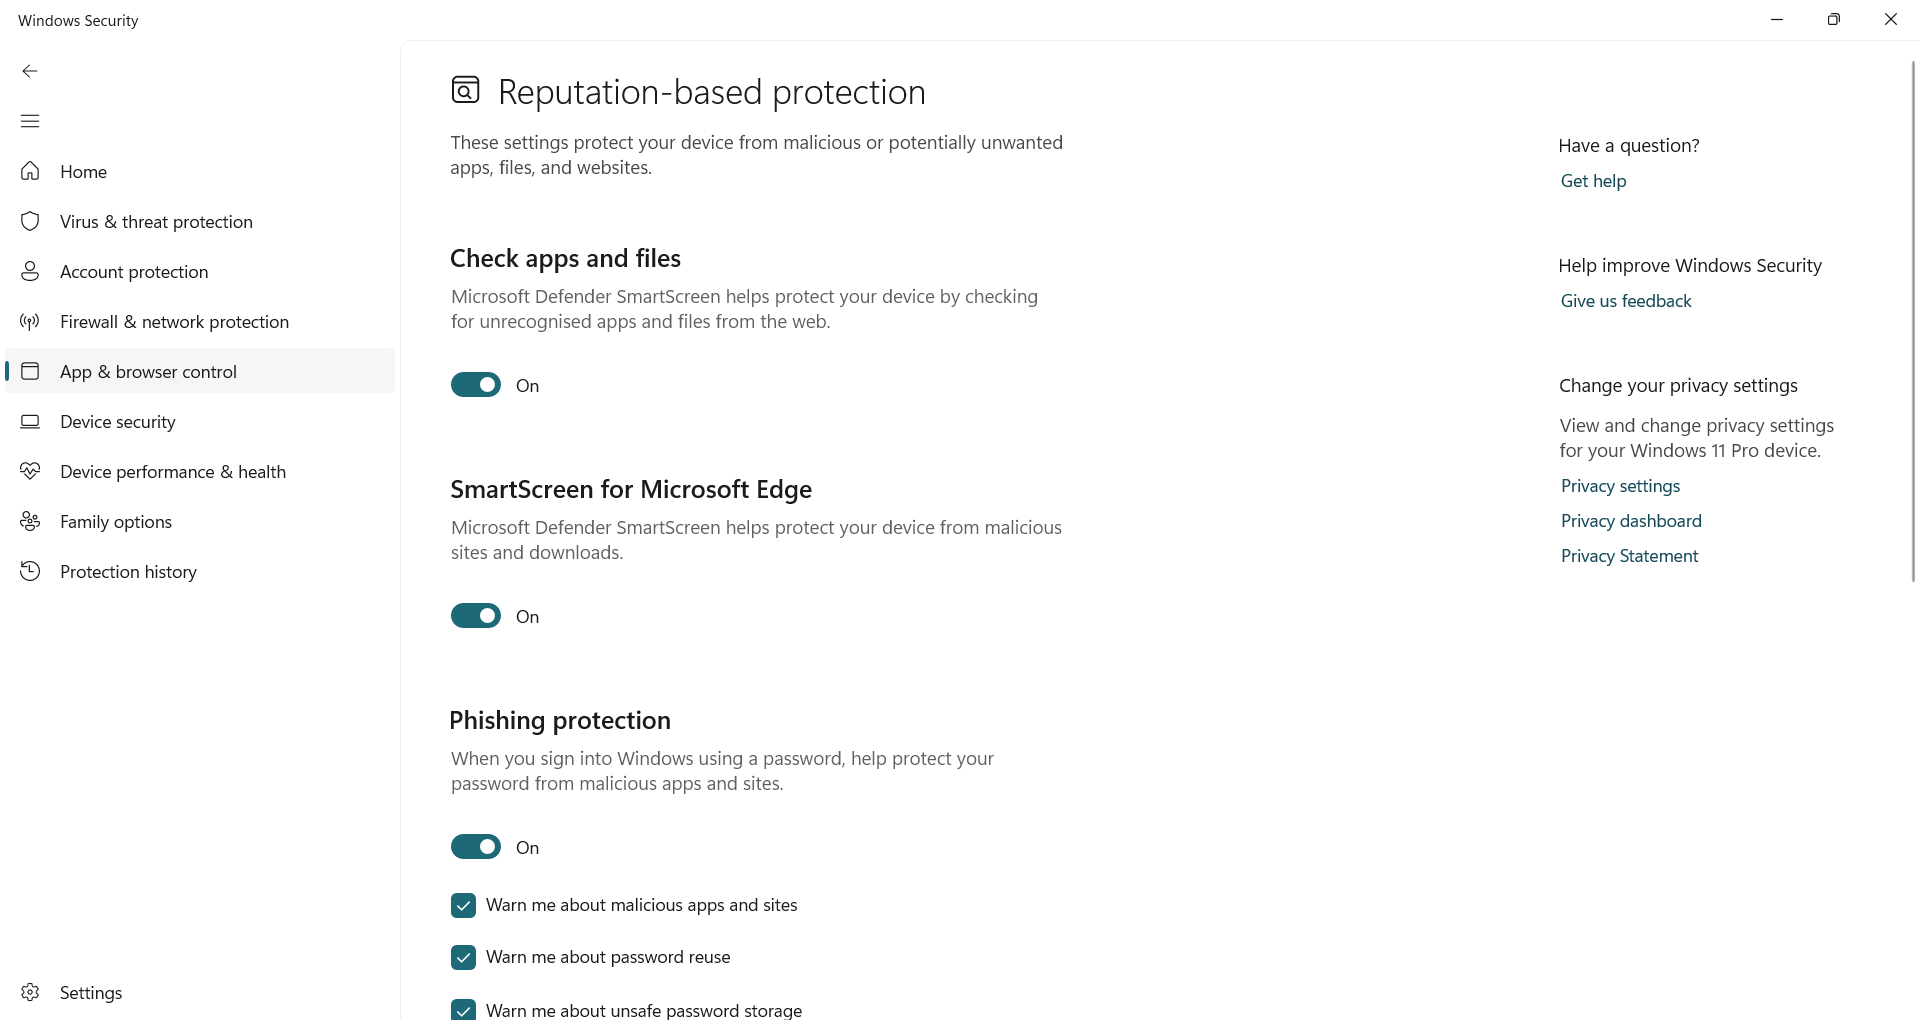
Once it’s active, Windows quietly monitors your activity in the background. If a file or site appears risky, you’ll receive a warning before it’s executed. You can still approve apps you trust, but these built-in checks help you avoid a mistake that could cost you later.
Use Offline Scan for Stubborn Threats
Some malware is sophisticated enough to evade regular scans. It hides deep within your system, starts running before Windows even loads, and evades detection while quietly causing damage in the background.
When that happens, a normal scan usually isn’t enough. That’s why Windows includes an Offline Scan, which performs a deeper check before Windows starts. This way, hidden threats don’t get a chance to load or interfere.
To run it, open Windows Security, head to Virus & threat protection, then click Scan options.

Select Microsoft Defender Antivirus (offline scan) and click Scan now.
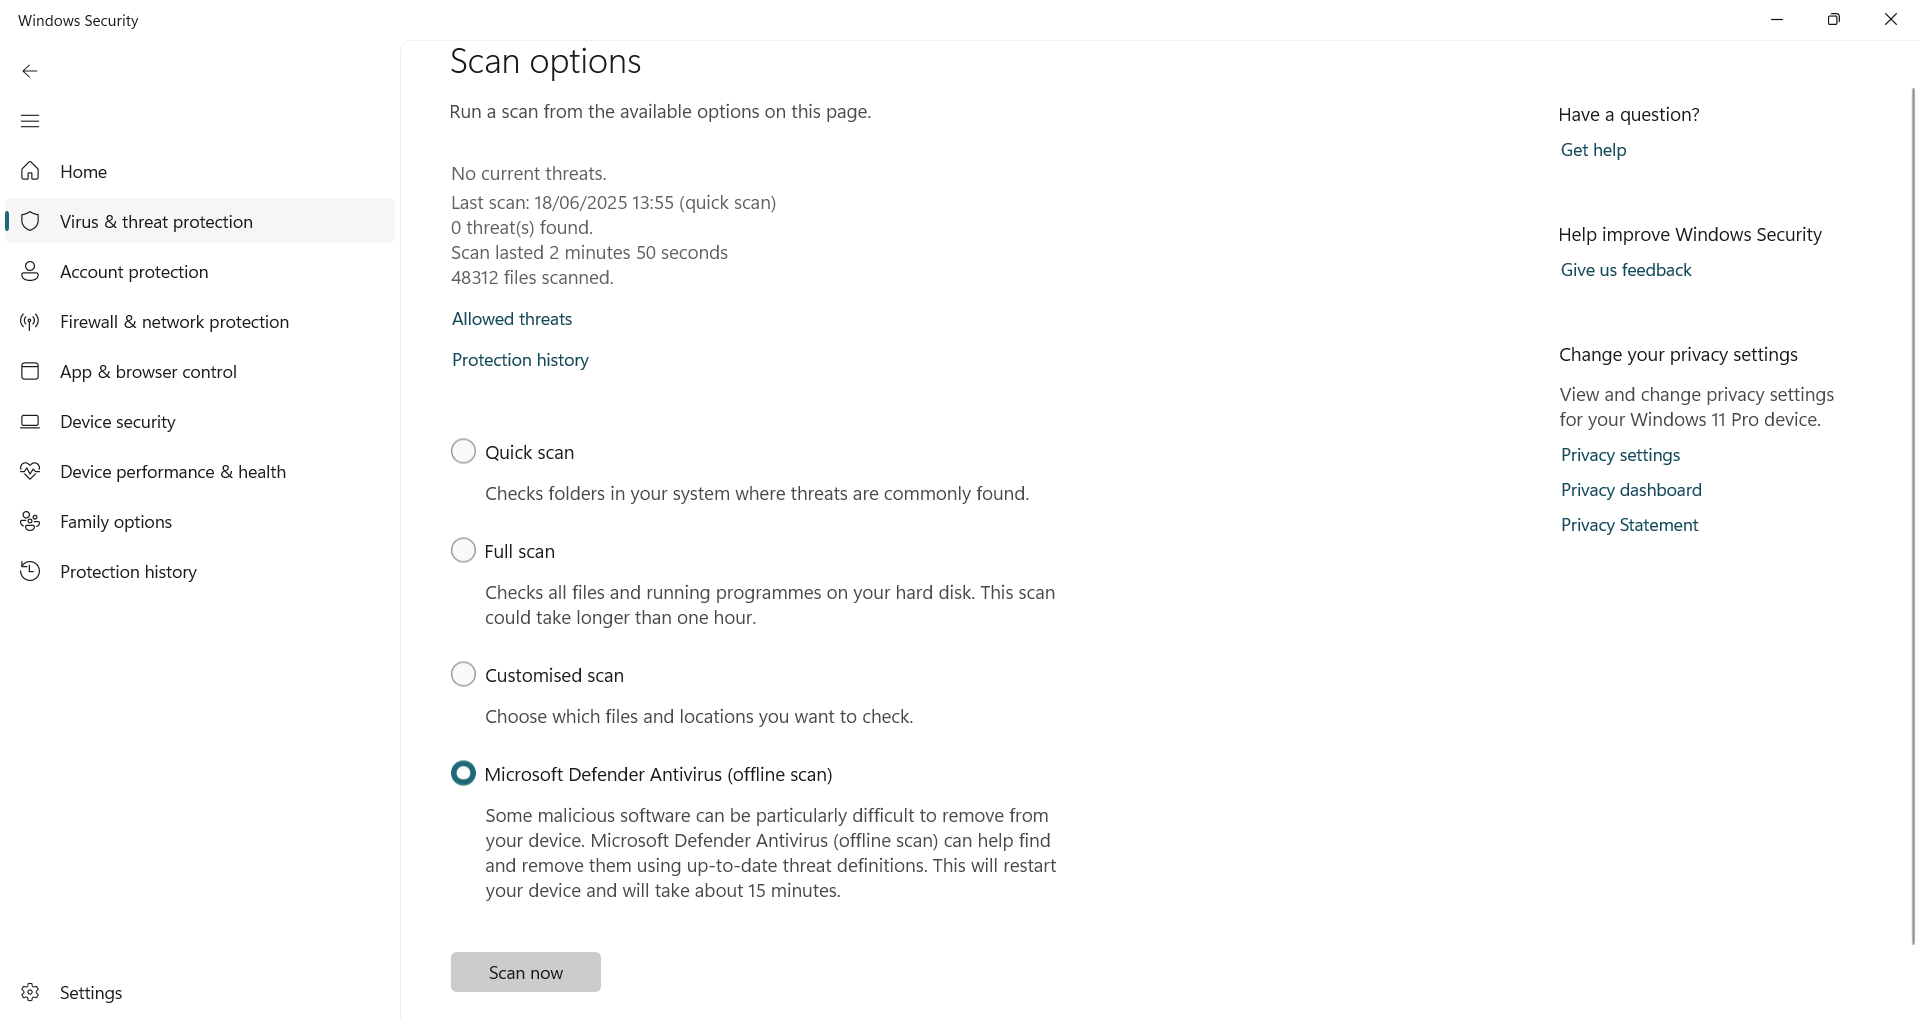
Your PC will restart, perform the scan in a clean state, and return to your desktop when it’s done. It only takes about 15 minutes, and once it starts, there’s nothing you need to do. When it finishes, open Protection history to see if anything was found or removed.
Shield Your System With Memory Integrity
Your system memory handles some of the most sensitive tasks on your PC. If malware manages to reach that level, it can tamper with critical processes, install rogue drivers, or quietly take control without ever touching your personal files.
Memory integrity acts like a security checkpoint at the heart of your system. It creates a protected environment using virtualization, keeping vital processes sealed off from anything untrusted. If something shady makes its way through, it gets blocked the moment it tries.
To activate this, navigate to Windows Security > Device security > Core isolation details. If Memory integrity is turned off, toggle it on. You may be prompted to restart your PC.
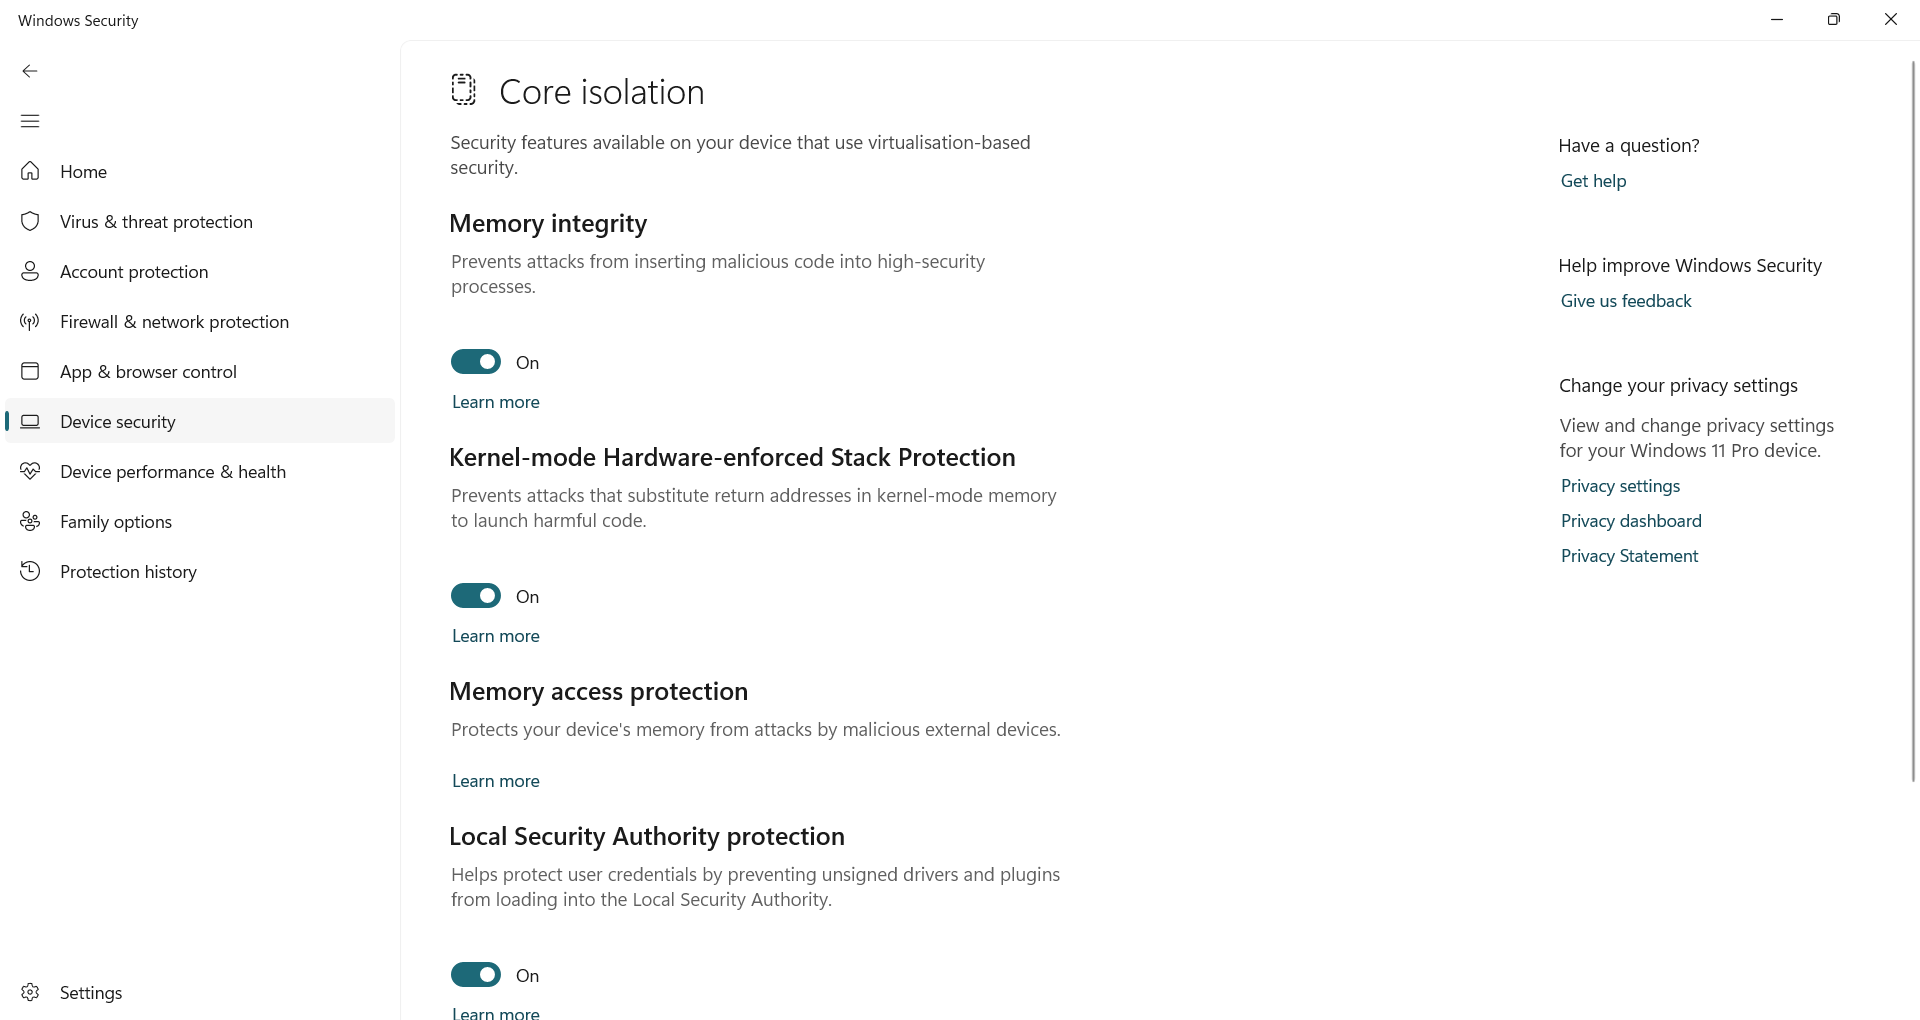
If the toggle doesn’t work right away, Windows may flag an outdated driver or app that’s causing a conflict. In that case, try updating or reinstalling the affected software. Once everything is compatible, Memory Integrity should turn on without any issues.
Exploit Protection Settings for System and Programs
Most security threats try to trick you into installing something shady, but exploits are a bit sneakier. Instead of asking for permission, they slip in through hidden flaws in your apps. All it takes is one overlooked vulnerability for an attacker to inject code, hijack a process, or quietly take control of your system.
Exploit Protection helps close those gaps before anything nasty can sneak through. Built right into Windows, it acts as a reinforced shield around your software’s weak spots. It monitors for known attack techniques and stops them automatically, even if the app itself hasn’t been patched yet. Whether it’s your browser, PDF viewer, or another everyday program, this feature helps prevent those apps from being turned against you.
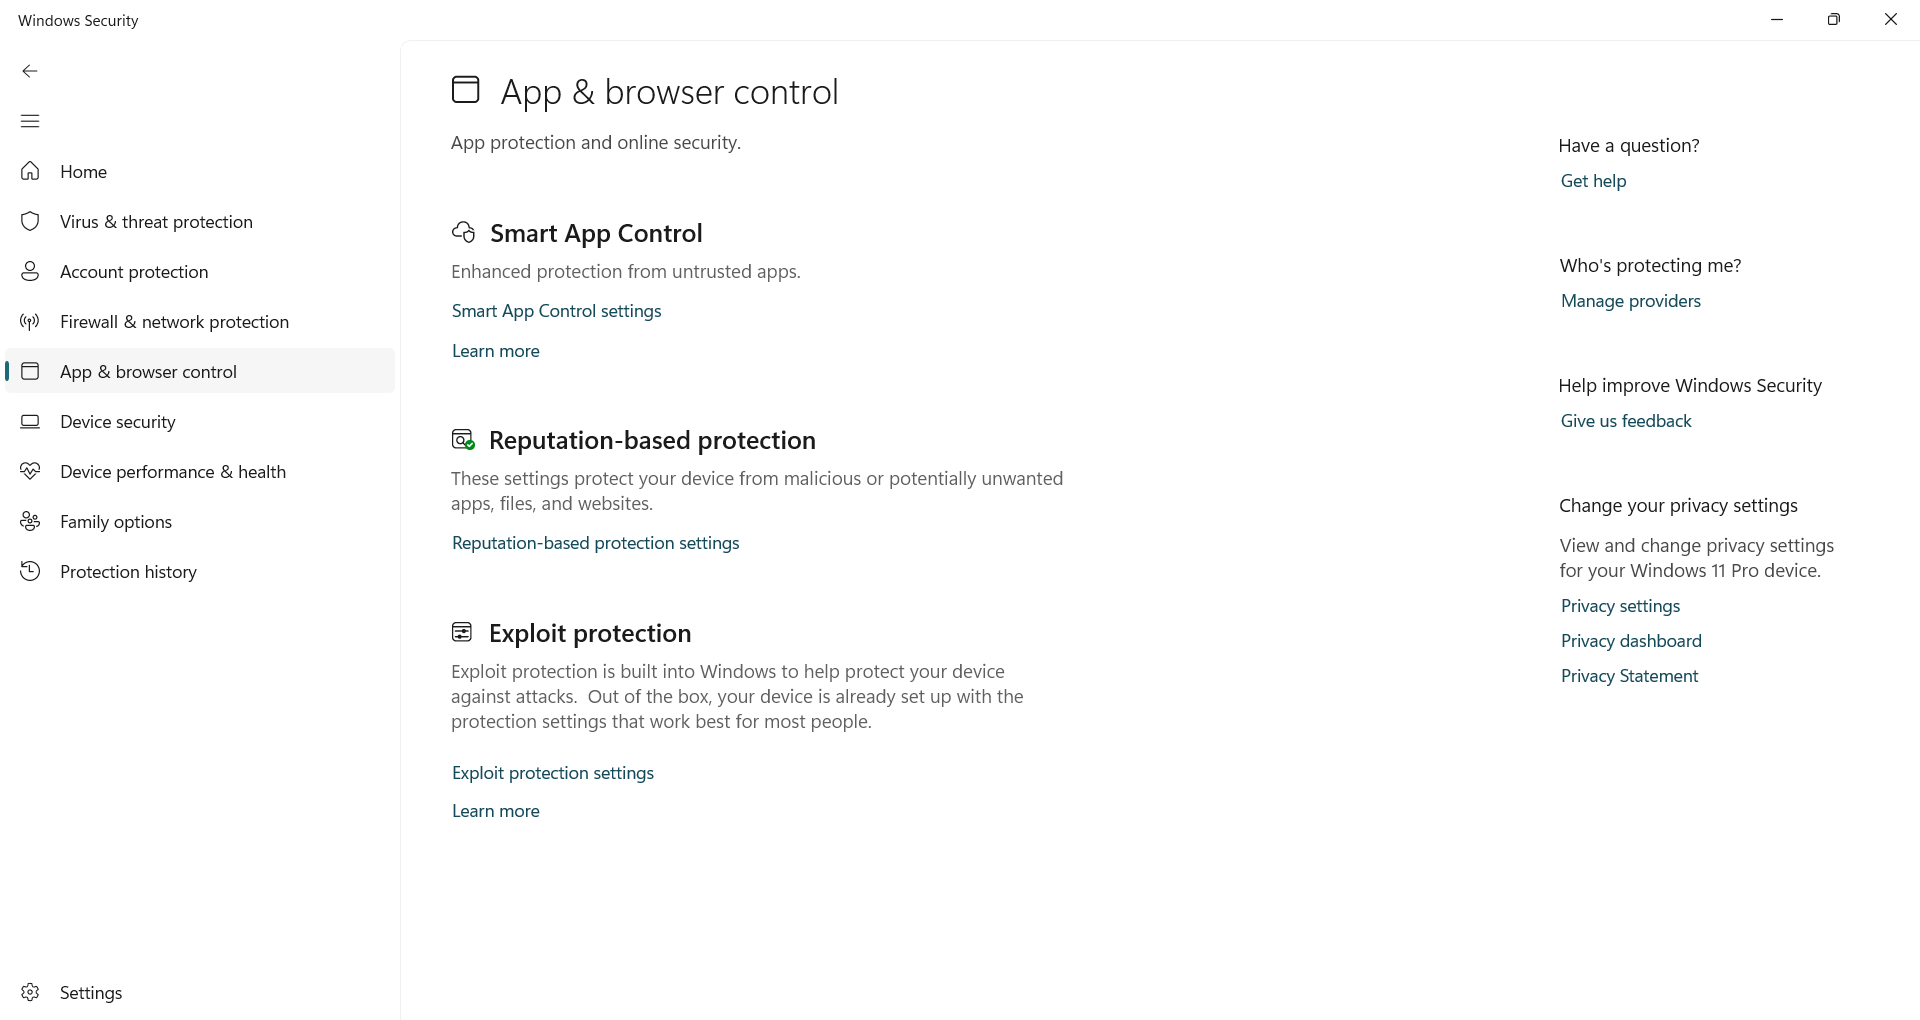
You’ll find it under Windows Security—head to App & browser control and click Exploit protection settings at the bottom. It includes two sections: System settings, which are enabled by default, and Programme settings, where you can create custom rules for individual apps.
To lock down a specific app, go to the Programme settings tab and click Add program to customize. Select an app or its .exe file, then enable advanced defenses, such as Control Flow Guard, Data Execution Prevention, or Mandatory ASLR, to block common exploit tactics.
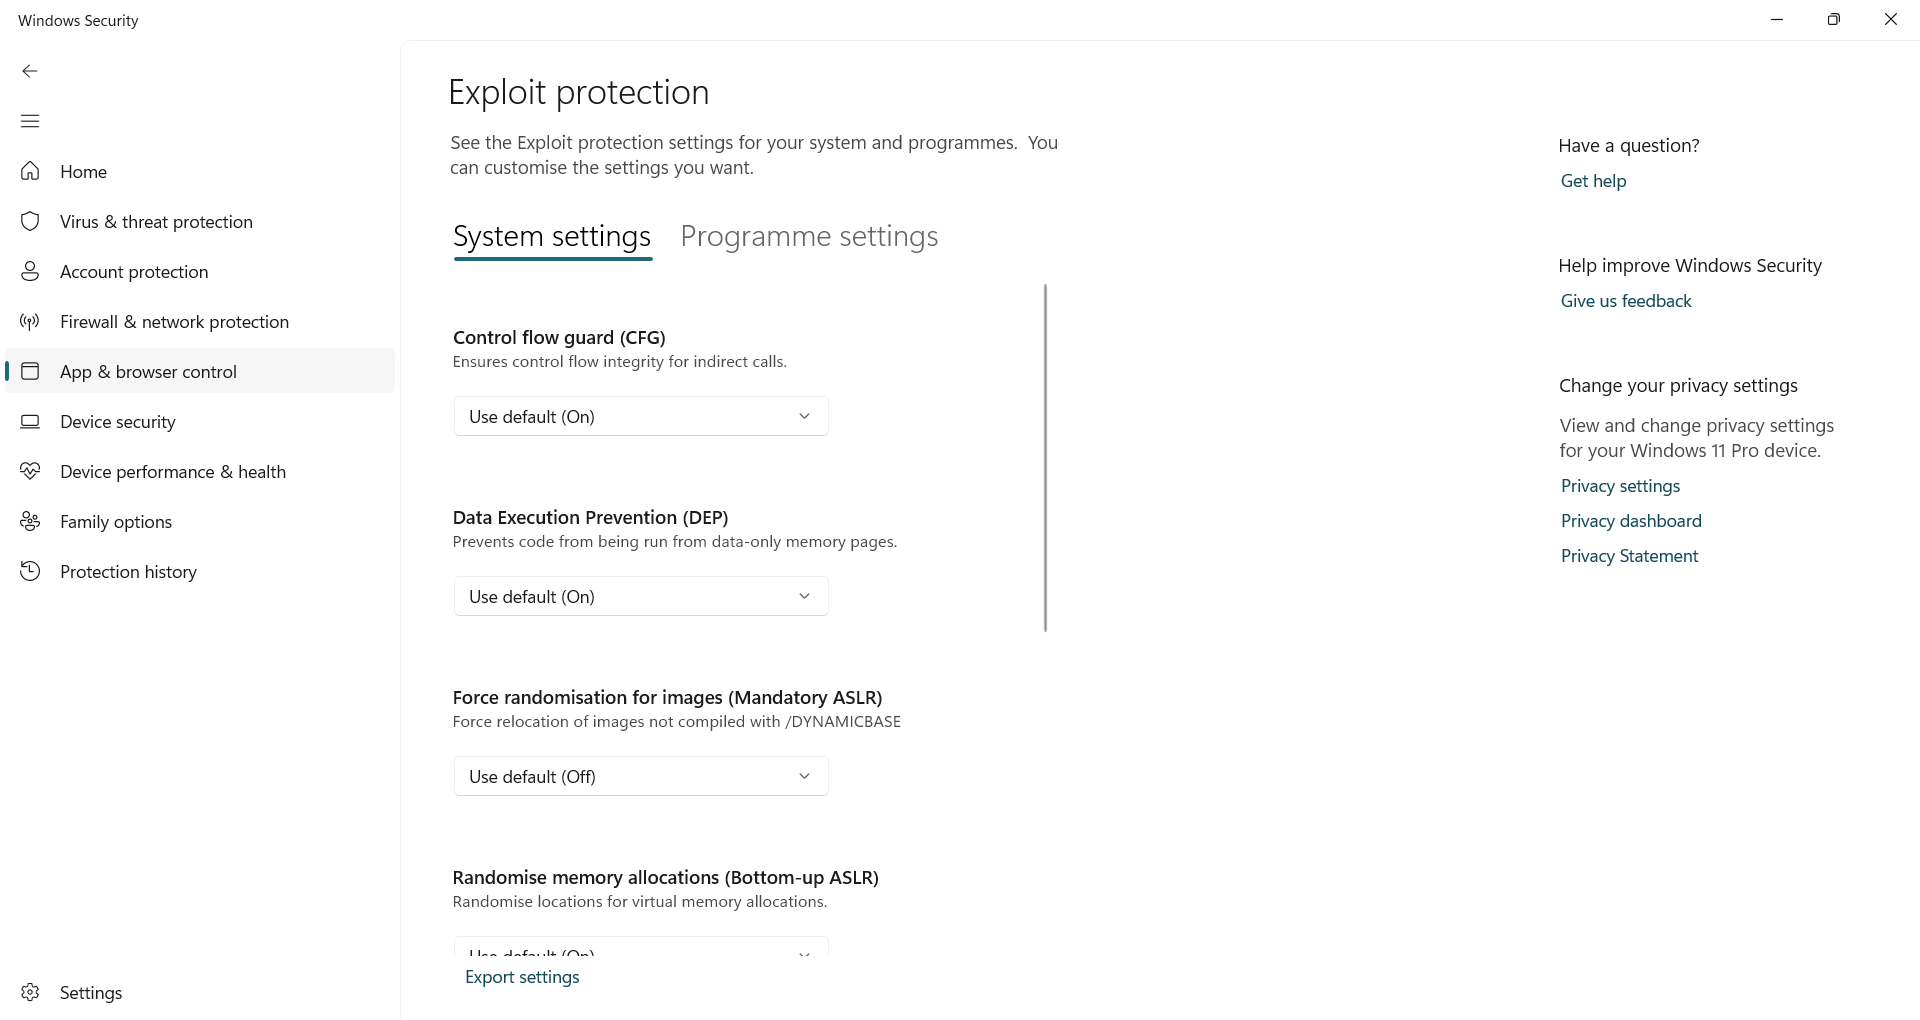
Unless you’re troubleshooting or locking down a high-risk app, the defaults are usually enough. But if you want more control, Exploit Protection gives you the flexibility to tighten up security even further.
Fix TPM Security Issues With a Quick Reset
The TPM (Trusted Platform Module) is a tiny but essential chip built into your computer. It handles critical security tasks, such as storing encryption keys and verifying hardware integrity.
However, after a major Windows update, BIOS change, or hardware upgrade, TPM-related problems can sometimes appear. You may encounter BitLocker errors, issues signing in with Windows Hello, or warnings about the security processor.
Fortunately, most TPM issues can be fixed by resetting it through Windows Security. This process clears its stored data and reinitializes the chip, which often fixes the problem without affecting your personal files. Just be aware that you may need to reconfigure certain features like BitLocker or Windows Hello afterward.
To reset the TPM, open Windows Security, go to Device security, and click Security processor details. Then select Security processor troubleshooting, pick a reason for the reset, and hit Clear TPM. Your PC will restart to complete the process.
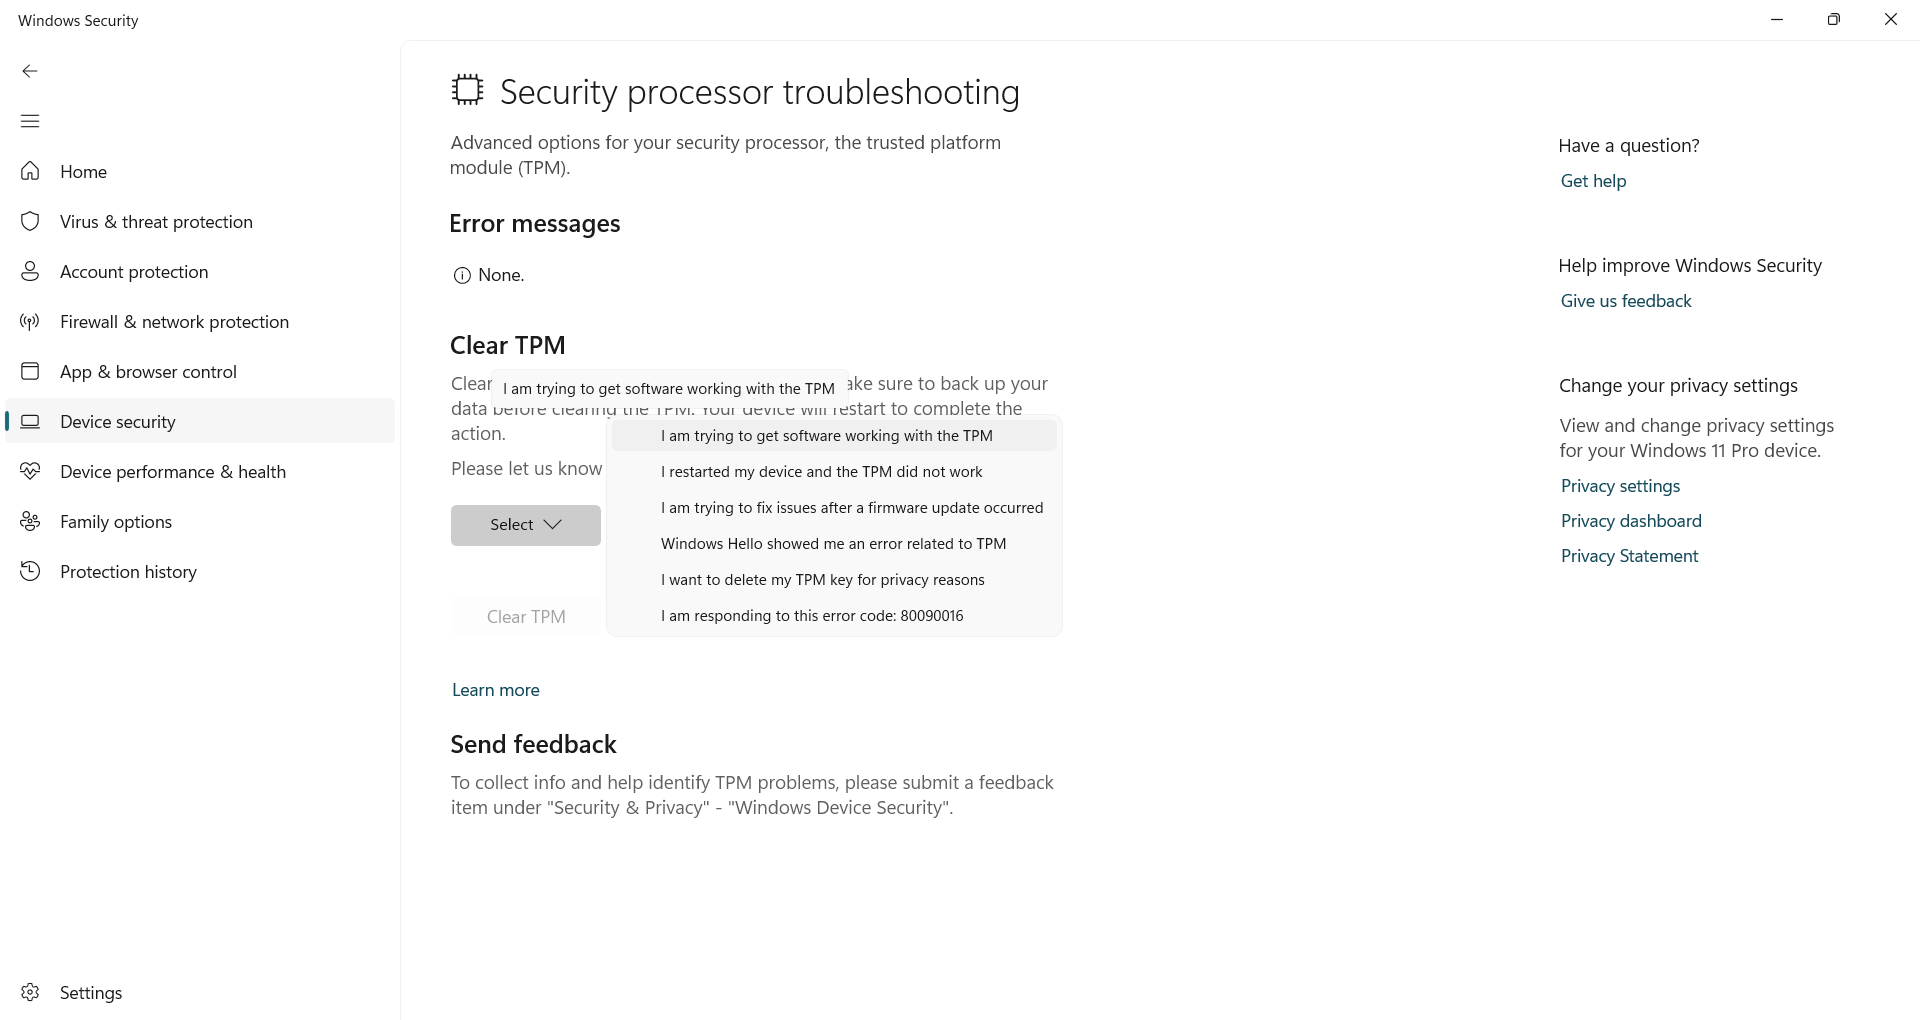
If you don’t see any TPM options, you might need to enable TPM in the BIOS first. Check your BIOS settings for something called TPM, fTPM, or PTT (depending on your hardware), and make sure it’s turned on before trying again.
Control What Your Family Can See and Do
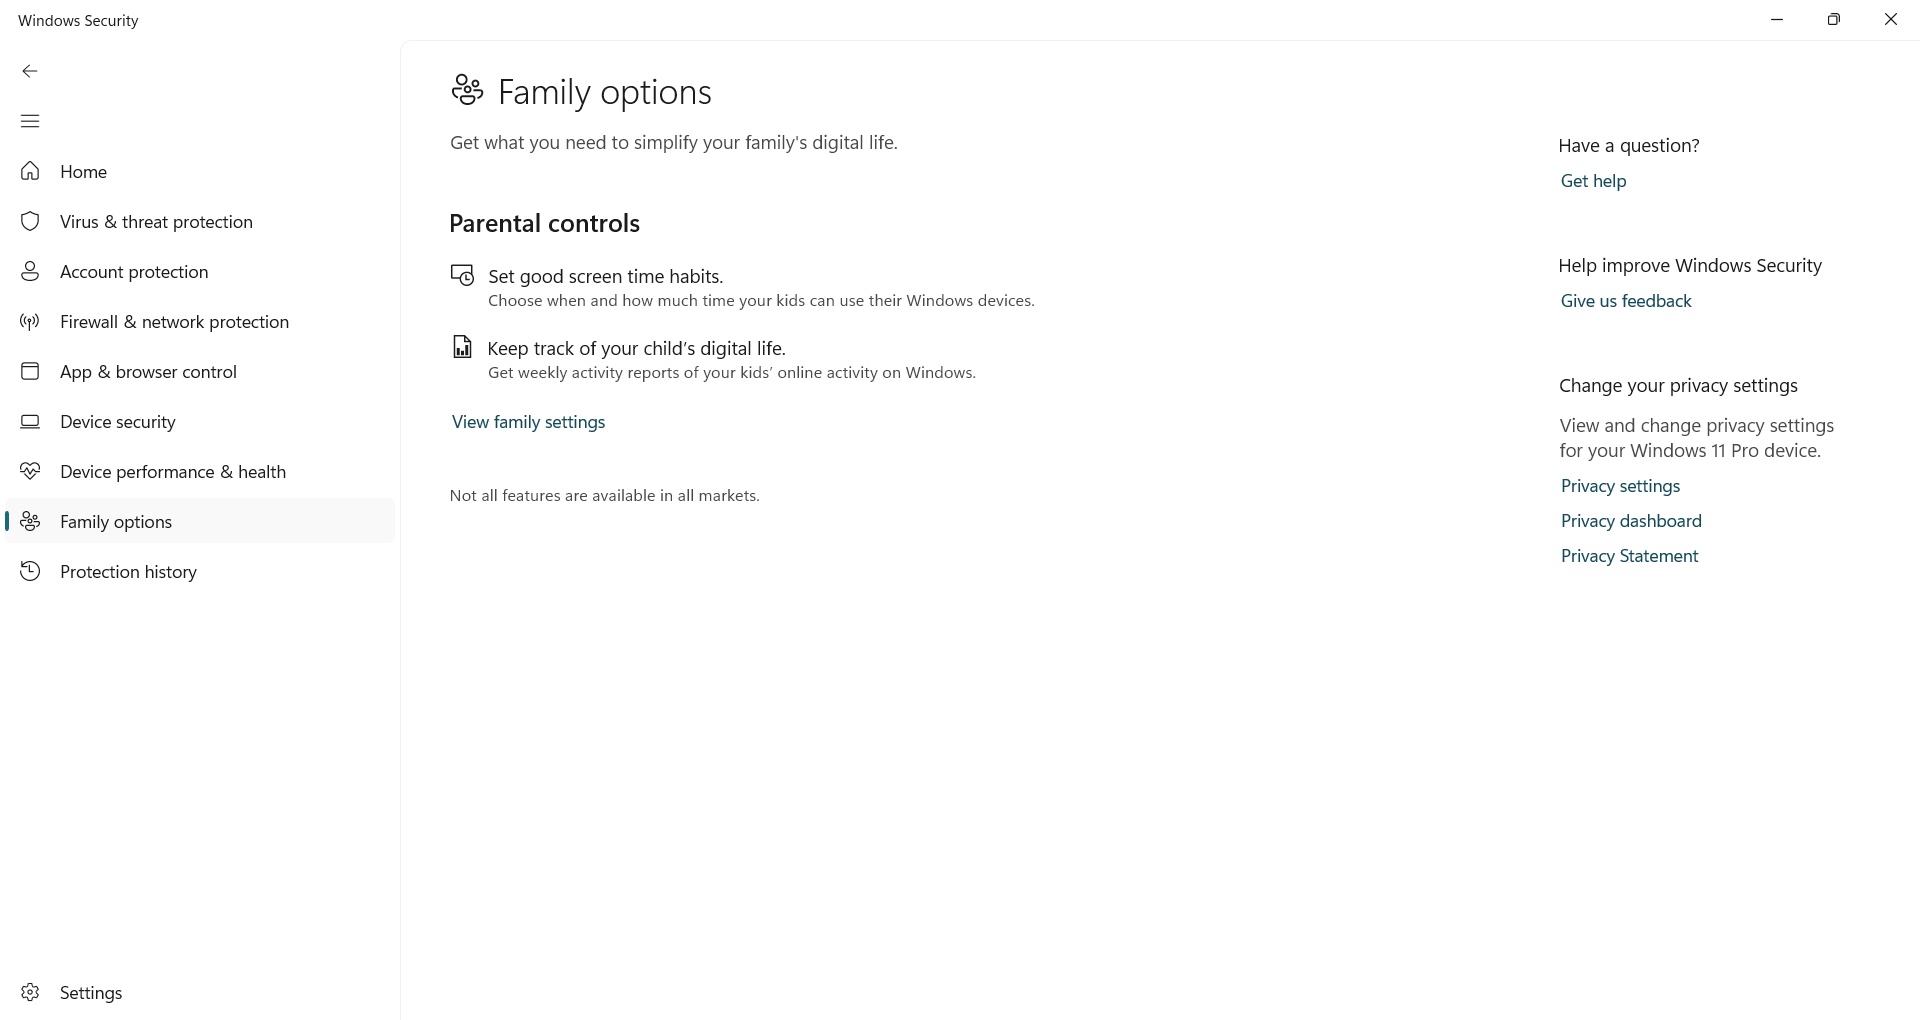
The Family options panel in Windows Security ties directly into Microsoft Family Safety, giving you a central place to set boundaries and monitor how your device is used.
From here, you can manage screen time, limit apps and games, filter web content, and apply rules to every member of your Microsoft family group. It’s especially helpful for guiding your child’s usage and preventing exposure to unsafe content or unapproved downloads.
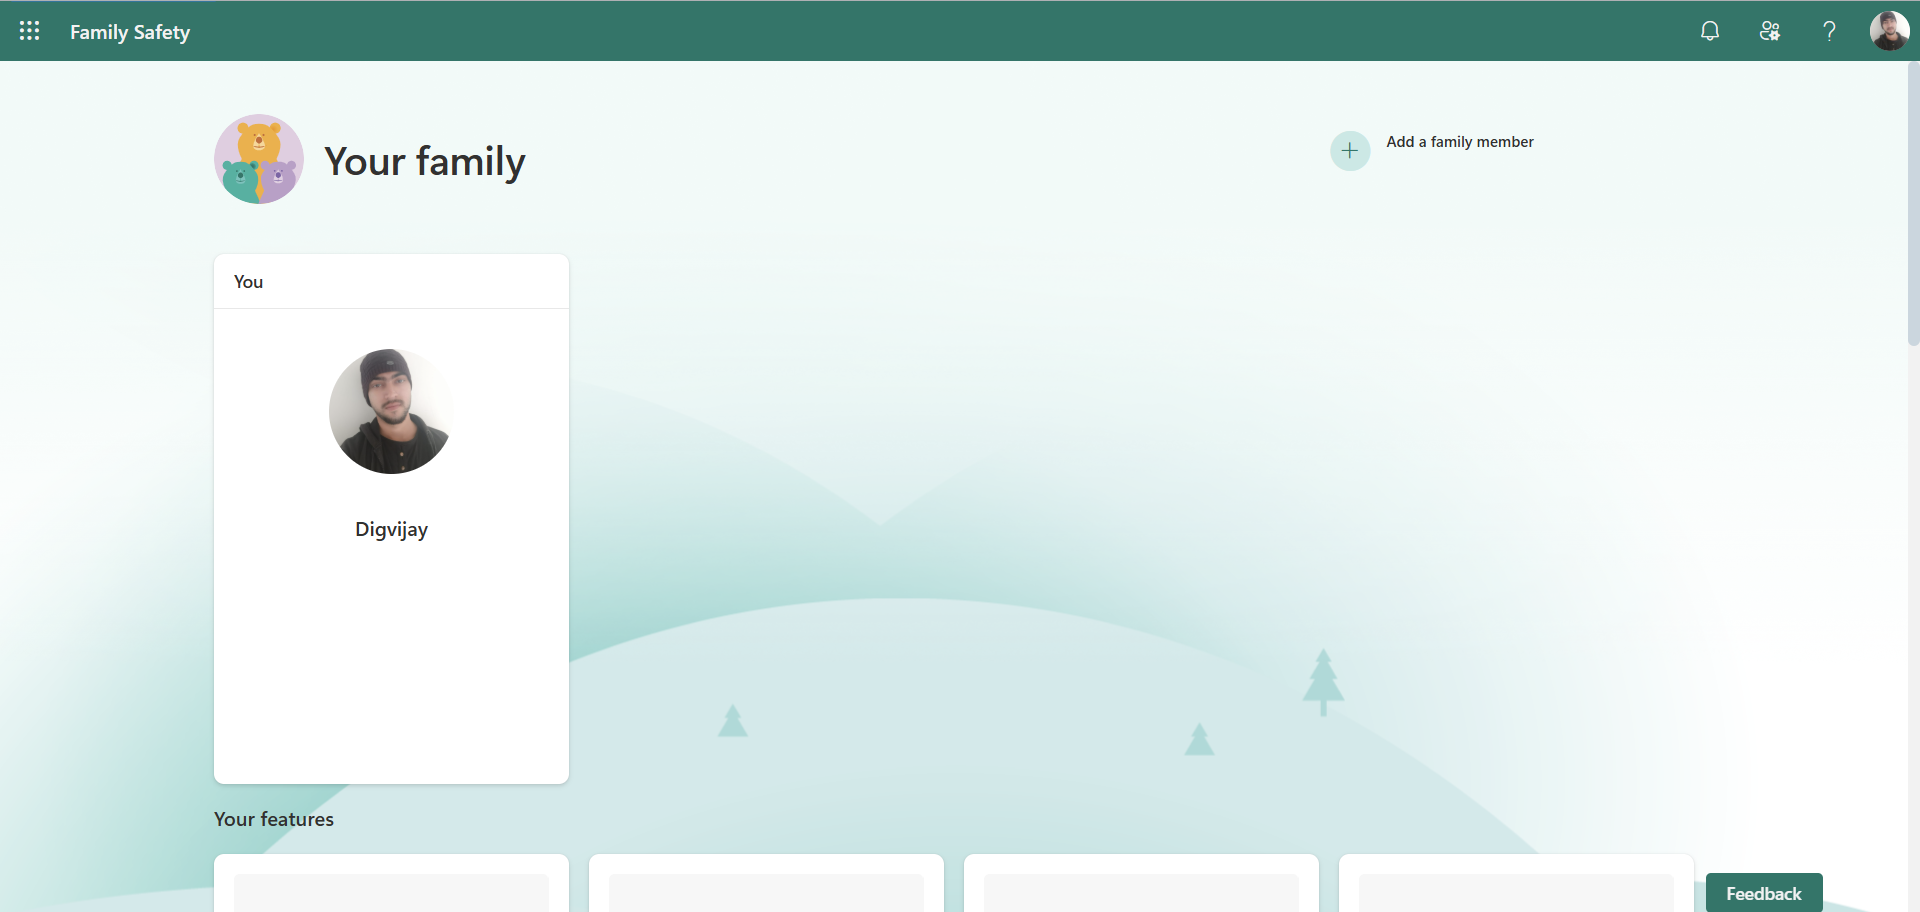
To access it, open Windows Security, scroll to Family options, and click View family settings. This will take you to the Microsoft Family Safety dashboard in your browser, where you can create child accounts, set restrictions, and check activity reports.
These settings stay linked to your child’s Microsoft account and carry over to any Windows device they use. If they try to access something that’s blocked, you’ll receive a notification and can choose whether to approve or deny the request.
So, these are some of the most powerful features tucked inside Windows Security. They help you protect your files, manage threats, and maintain control over your device’s security. If you haven’t explored them yet, now’s a good time to start.


